Deploying Your First Contract on Adventure Layer Testnet
This tutorial walks you through the process of deploying your first smart contract to Adventure Layer Testnet using the Remix in-browser Solidity IDE.
Dependencies
- Firefox or any Chromium-based browser (Chrome, Brave, Edge, etc.)
Wallet Setup
You’ll need access to an Ethereum wallet if you want to deploy a smart contract.
This tutorial uses MetaMask, a popular browser extension wallet, just to get you started.
MetaMask is also available as a mobile application, but it’s typically easier to use the browser extension for development.
If you already have MetaMask installed, you can skip this section.
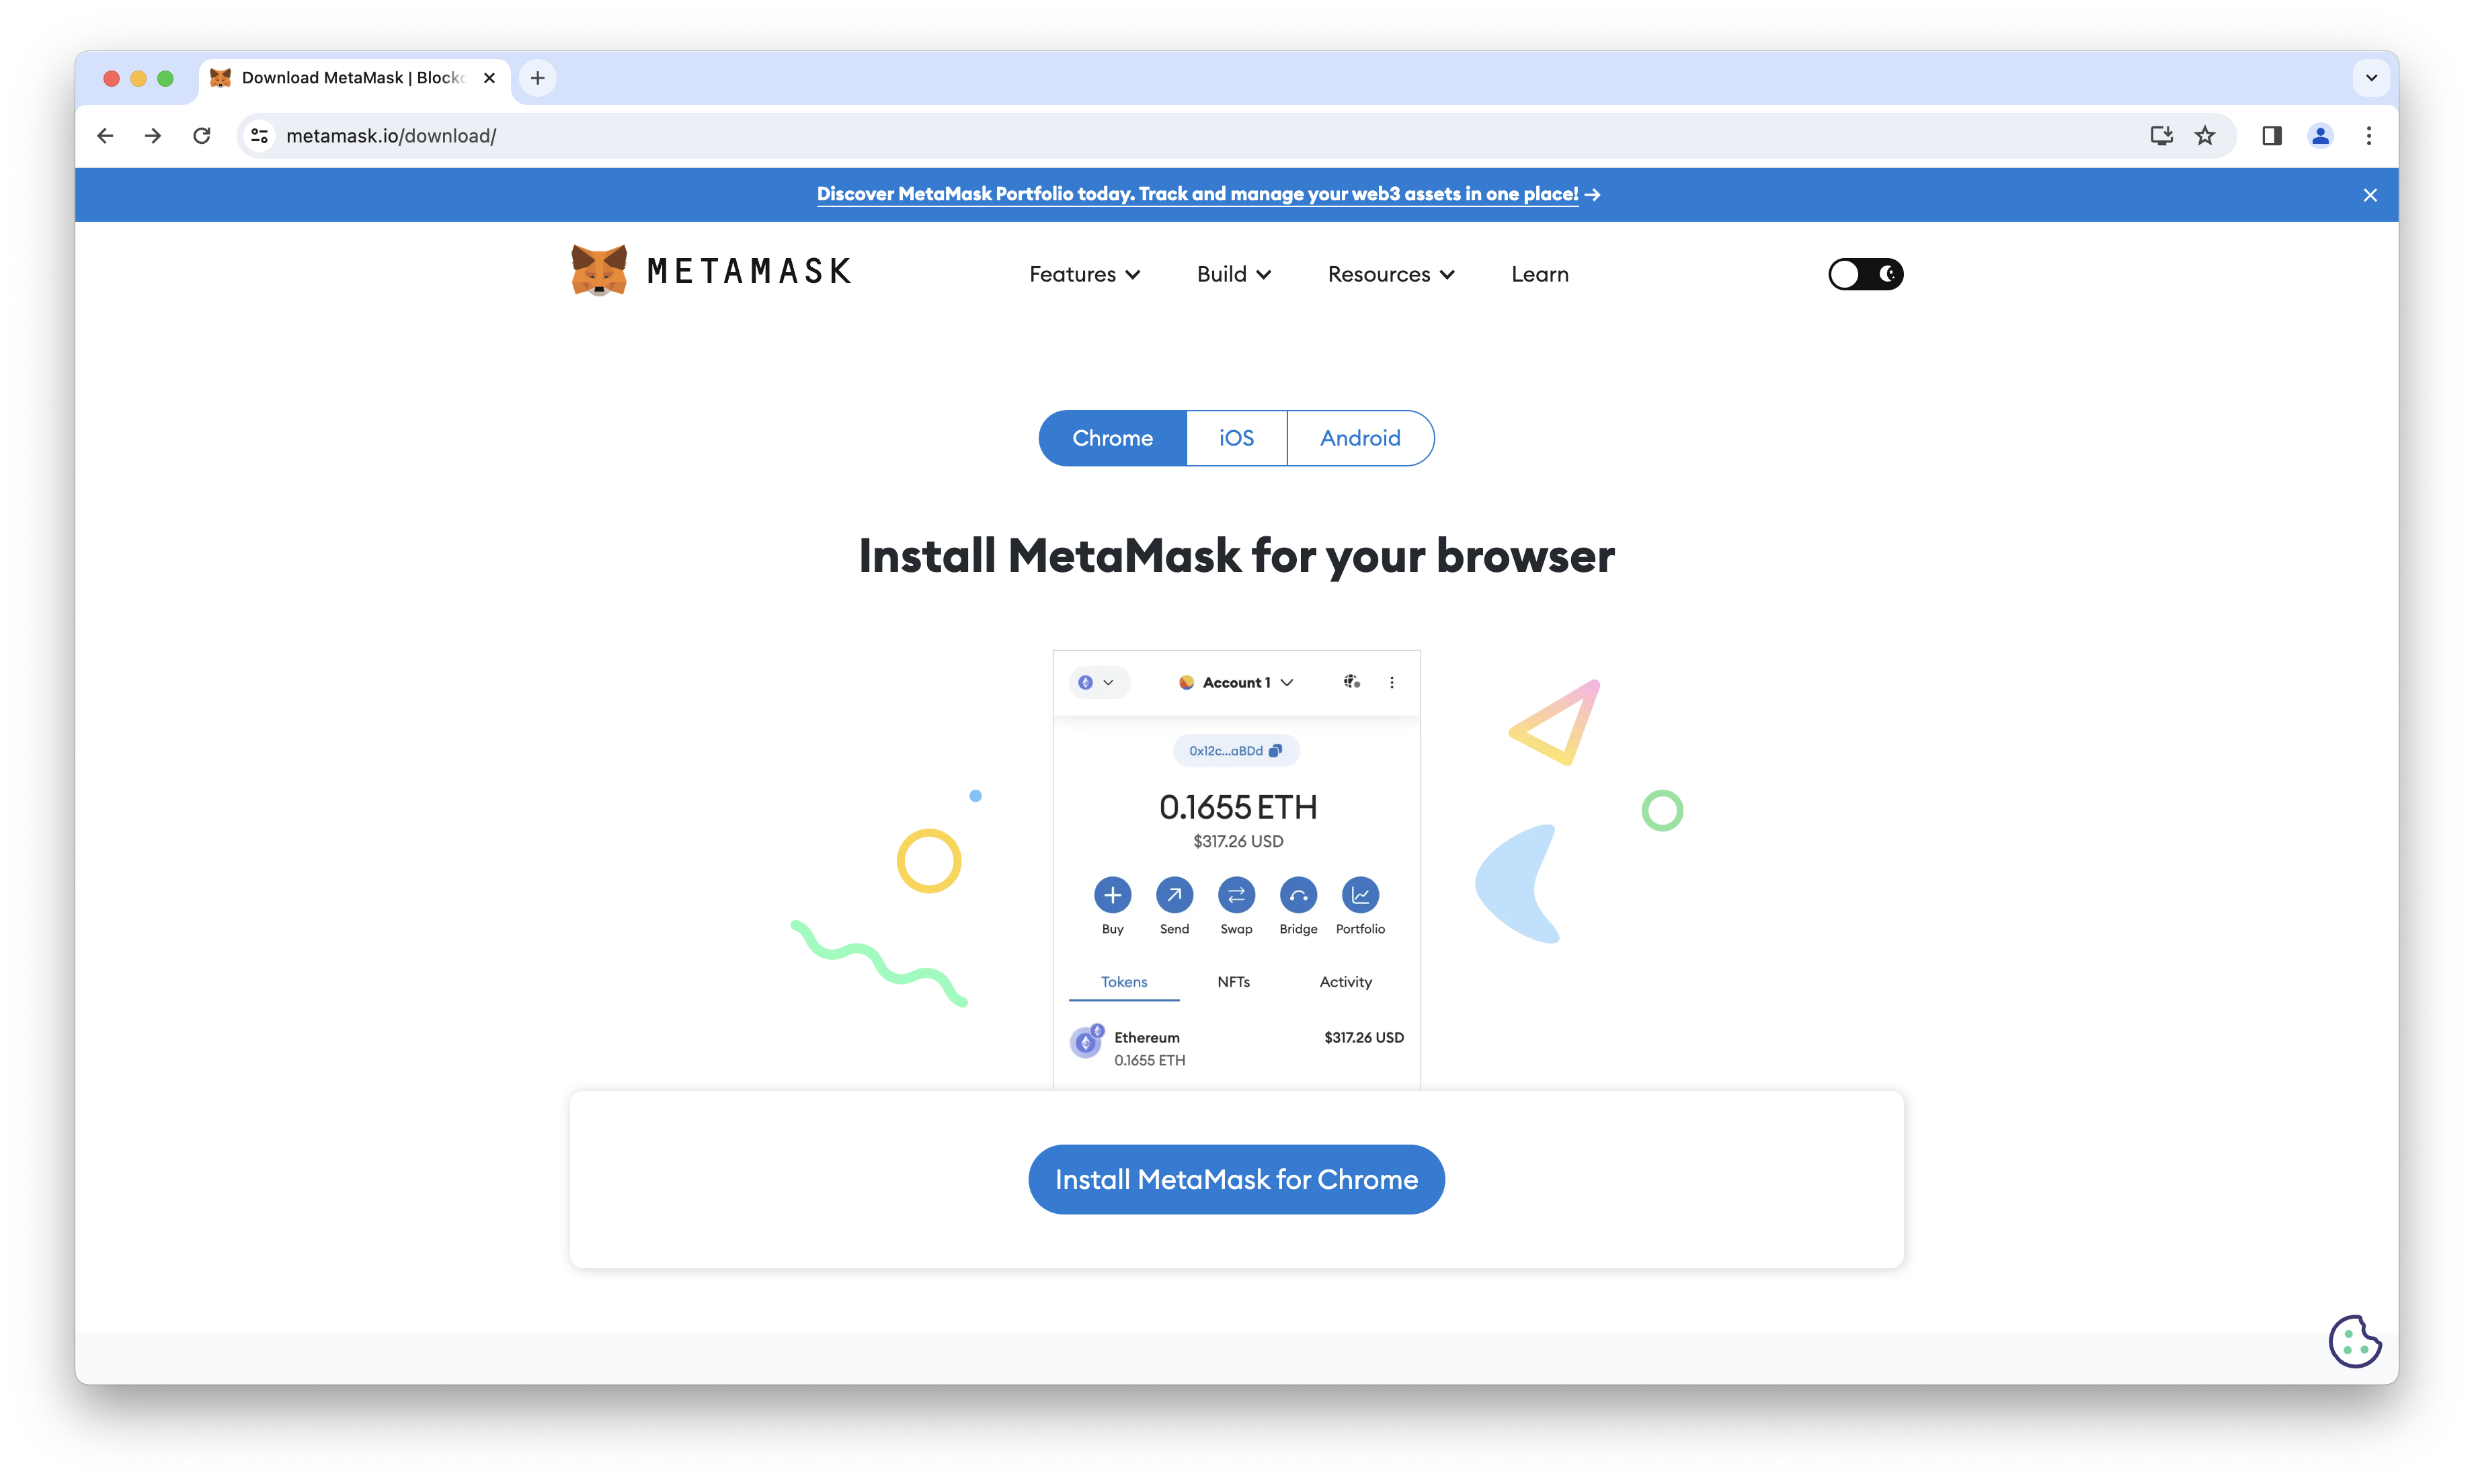
Head over to
metamask.io and click the “Download” button.
You’ll then be given an option to install the MetaMask extension for your browser.
If using a Chromium-based browser, you may be prompted to install the MetaMask extension from the Chrome Web Store.
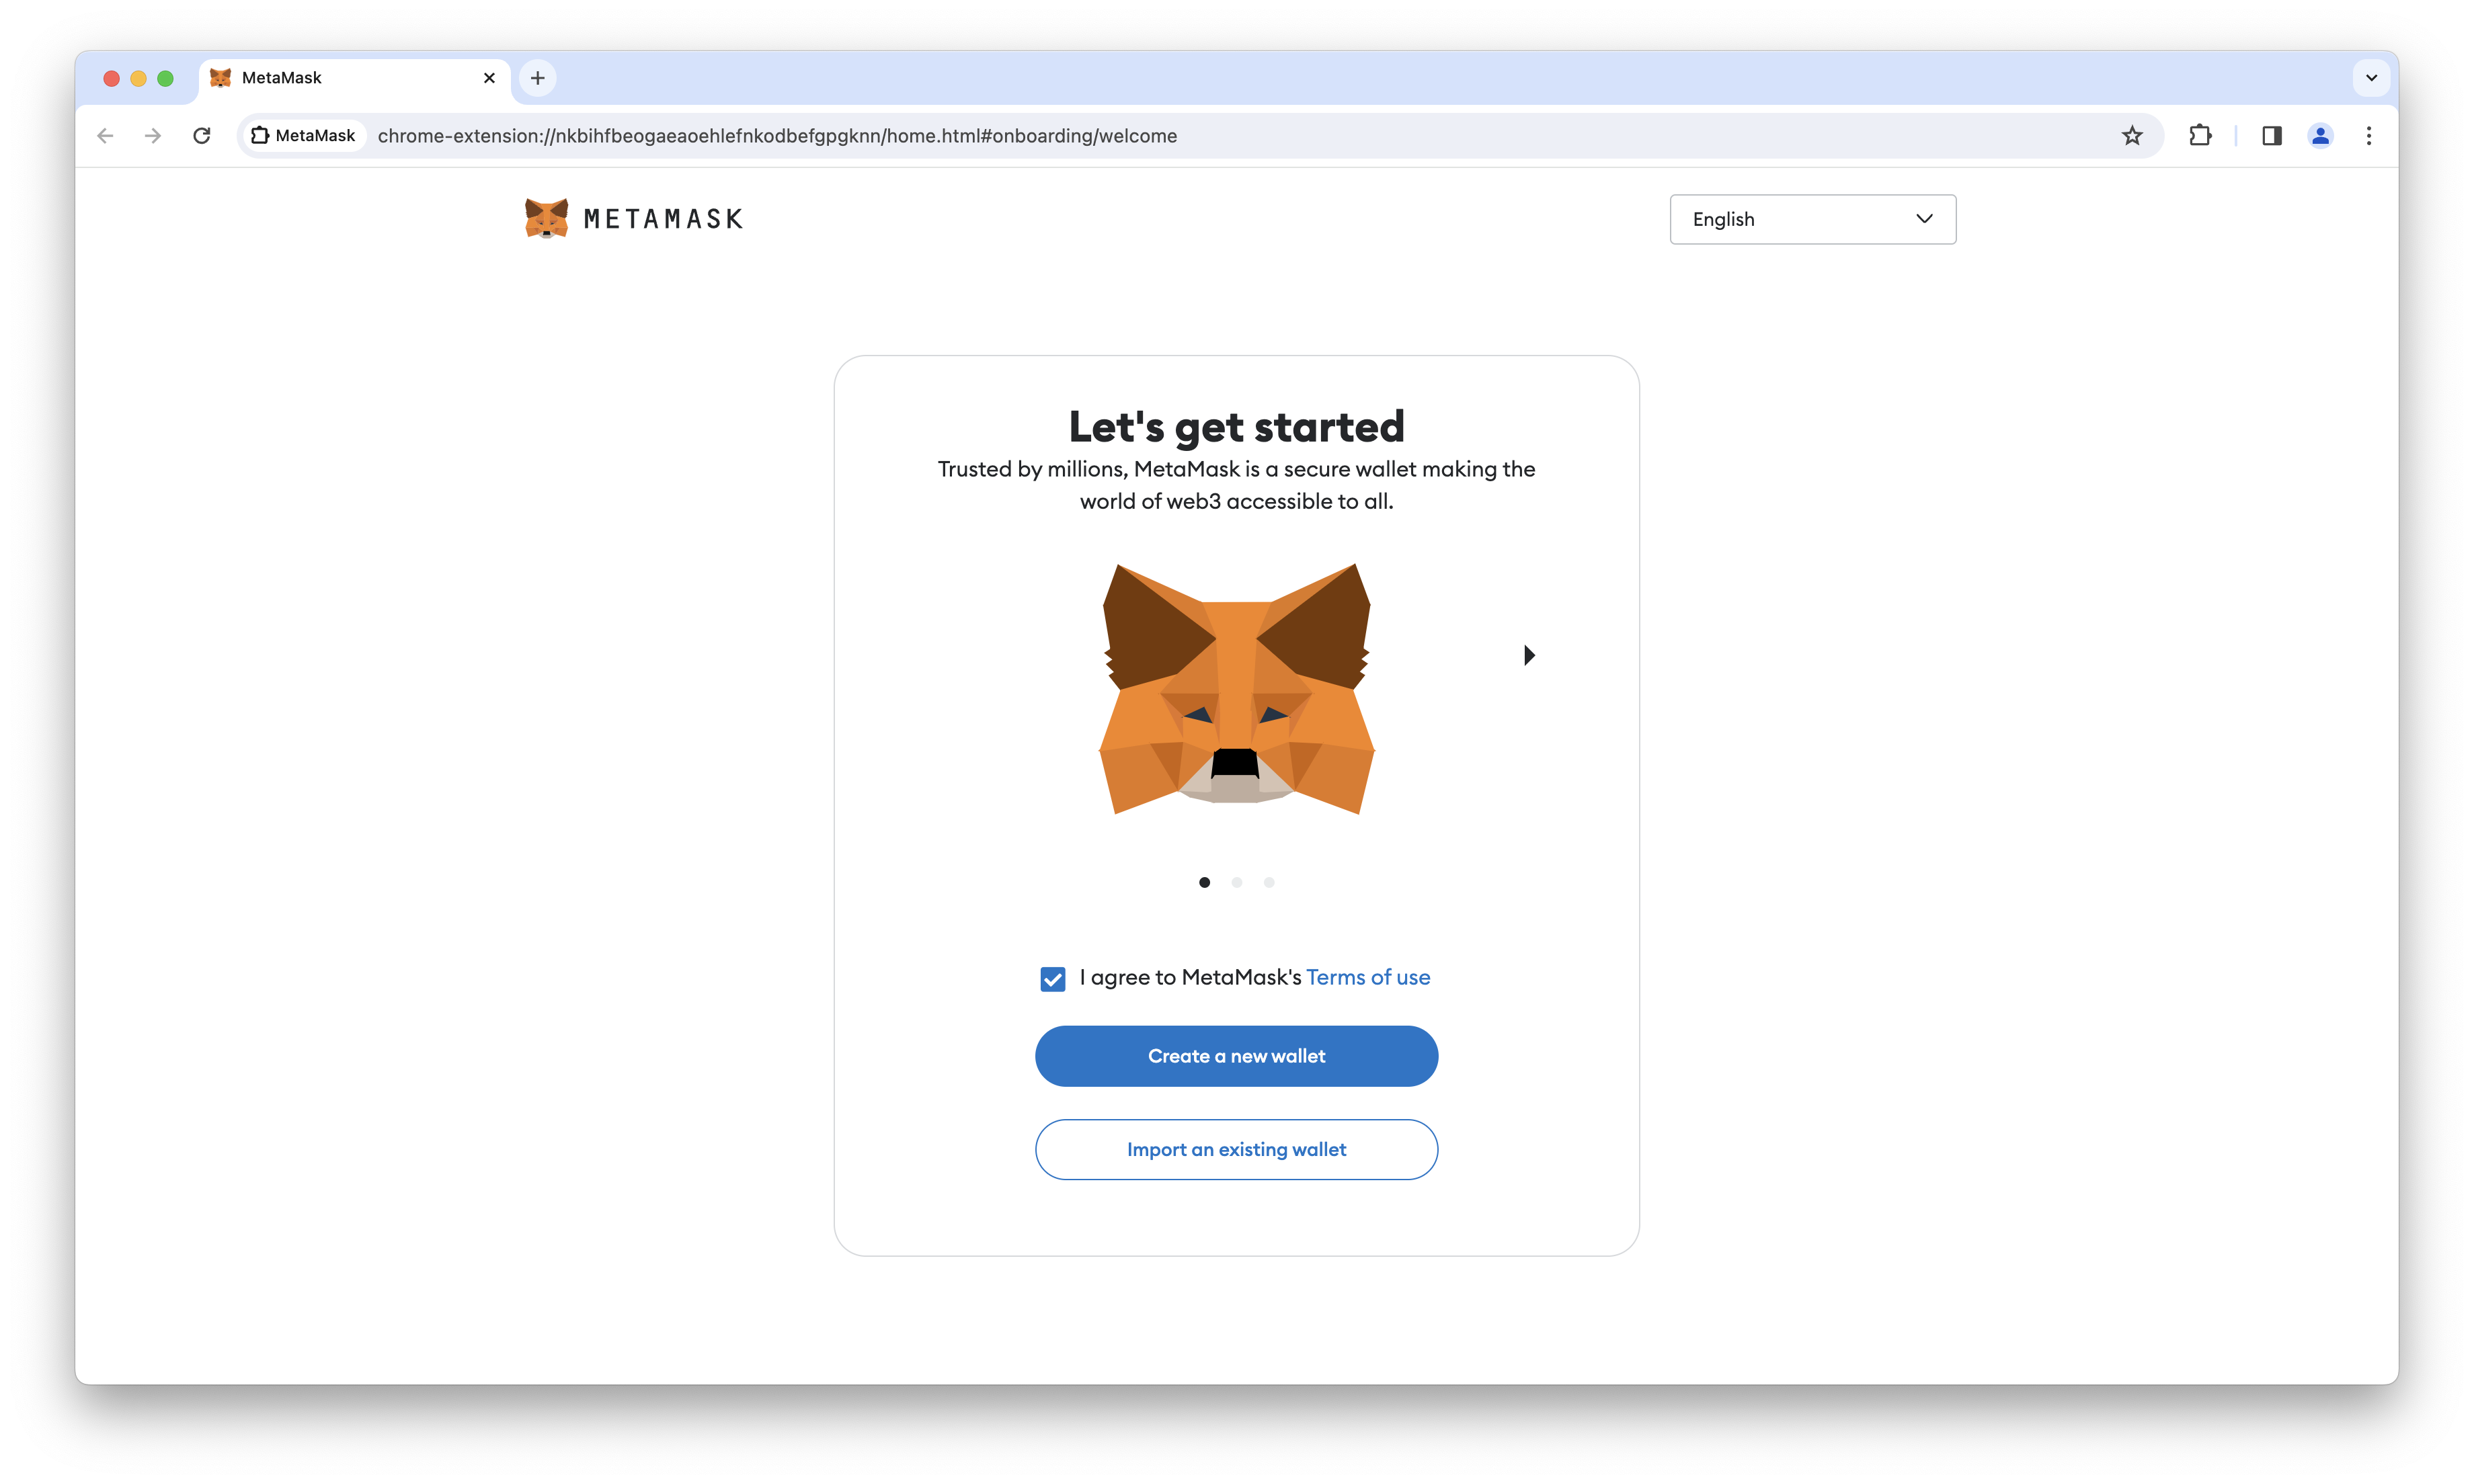
An onboarding page will pop up once the extension is installed.
MetaMask will ask you to accept their terms of service.
Read them carefully, then tick the box to accept them.
Once you’ve accepted the terms of service, you can create a new wallet by clicking the “Create a new wallet” button.
After starting the wallet creation process you’ll be asked if you’d like to share usage data with MetaMask.
This is entirely up to you.
Select “I agree” or “No thanks” depending on your preference.
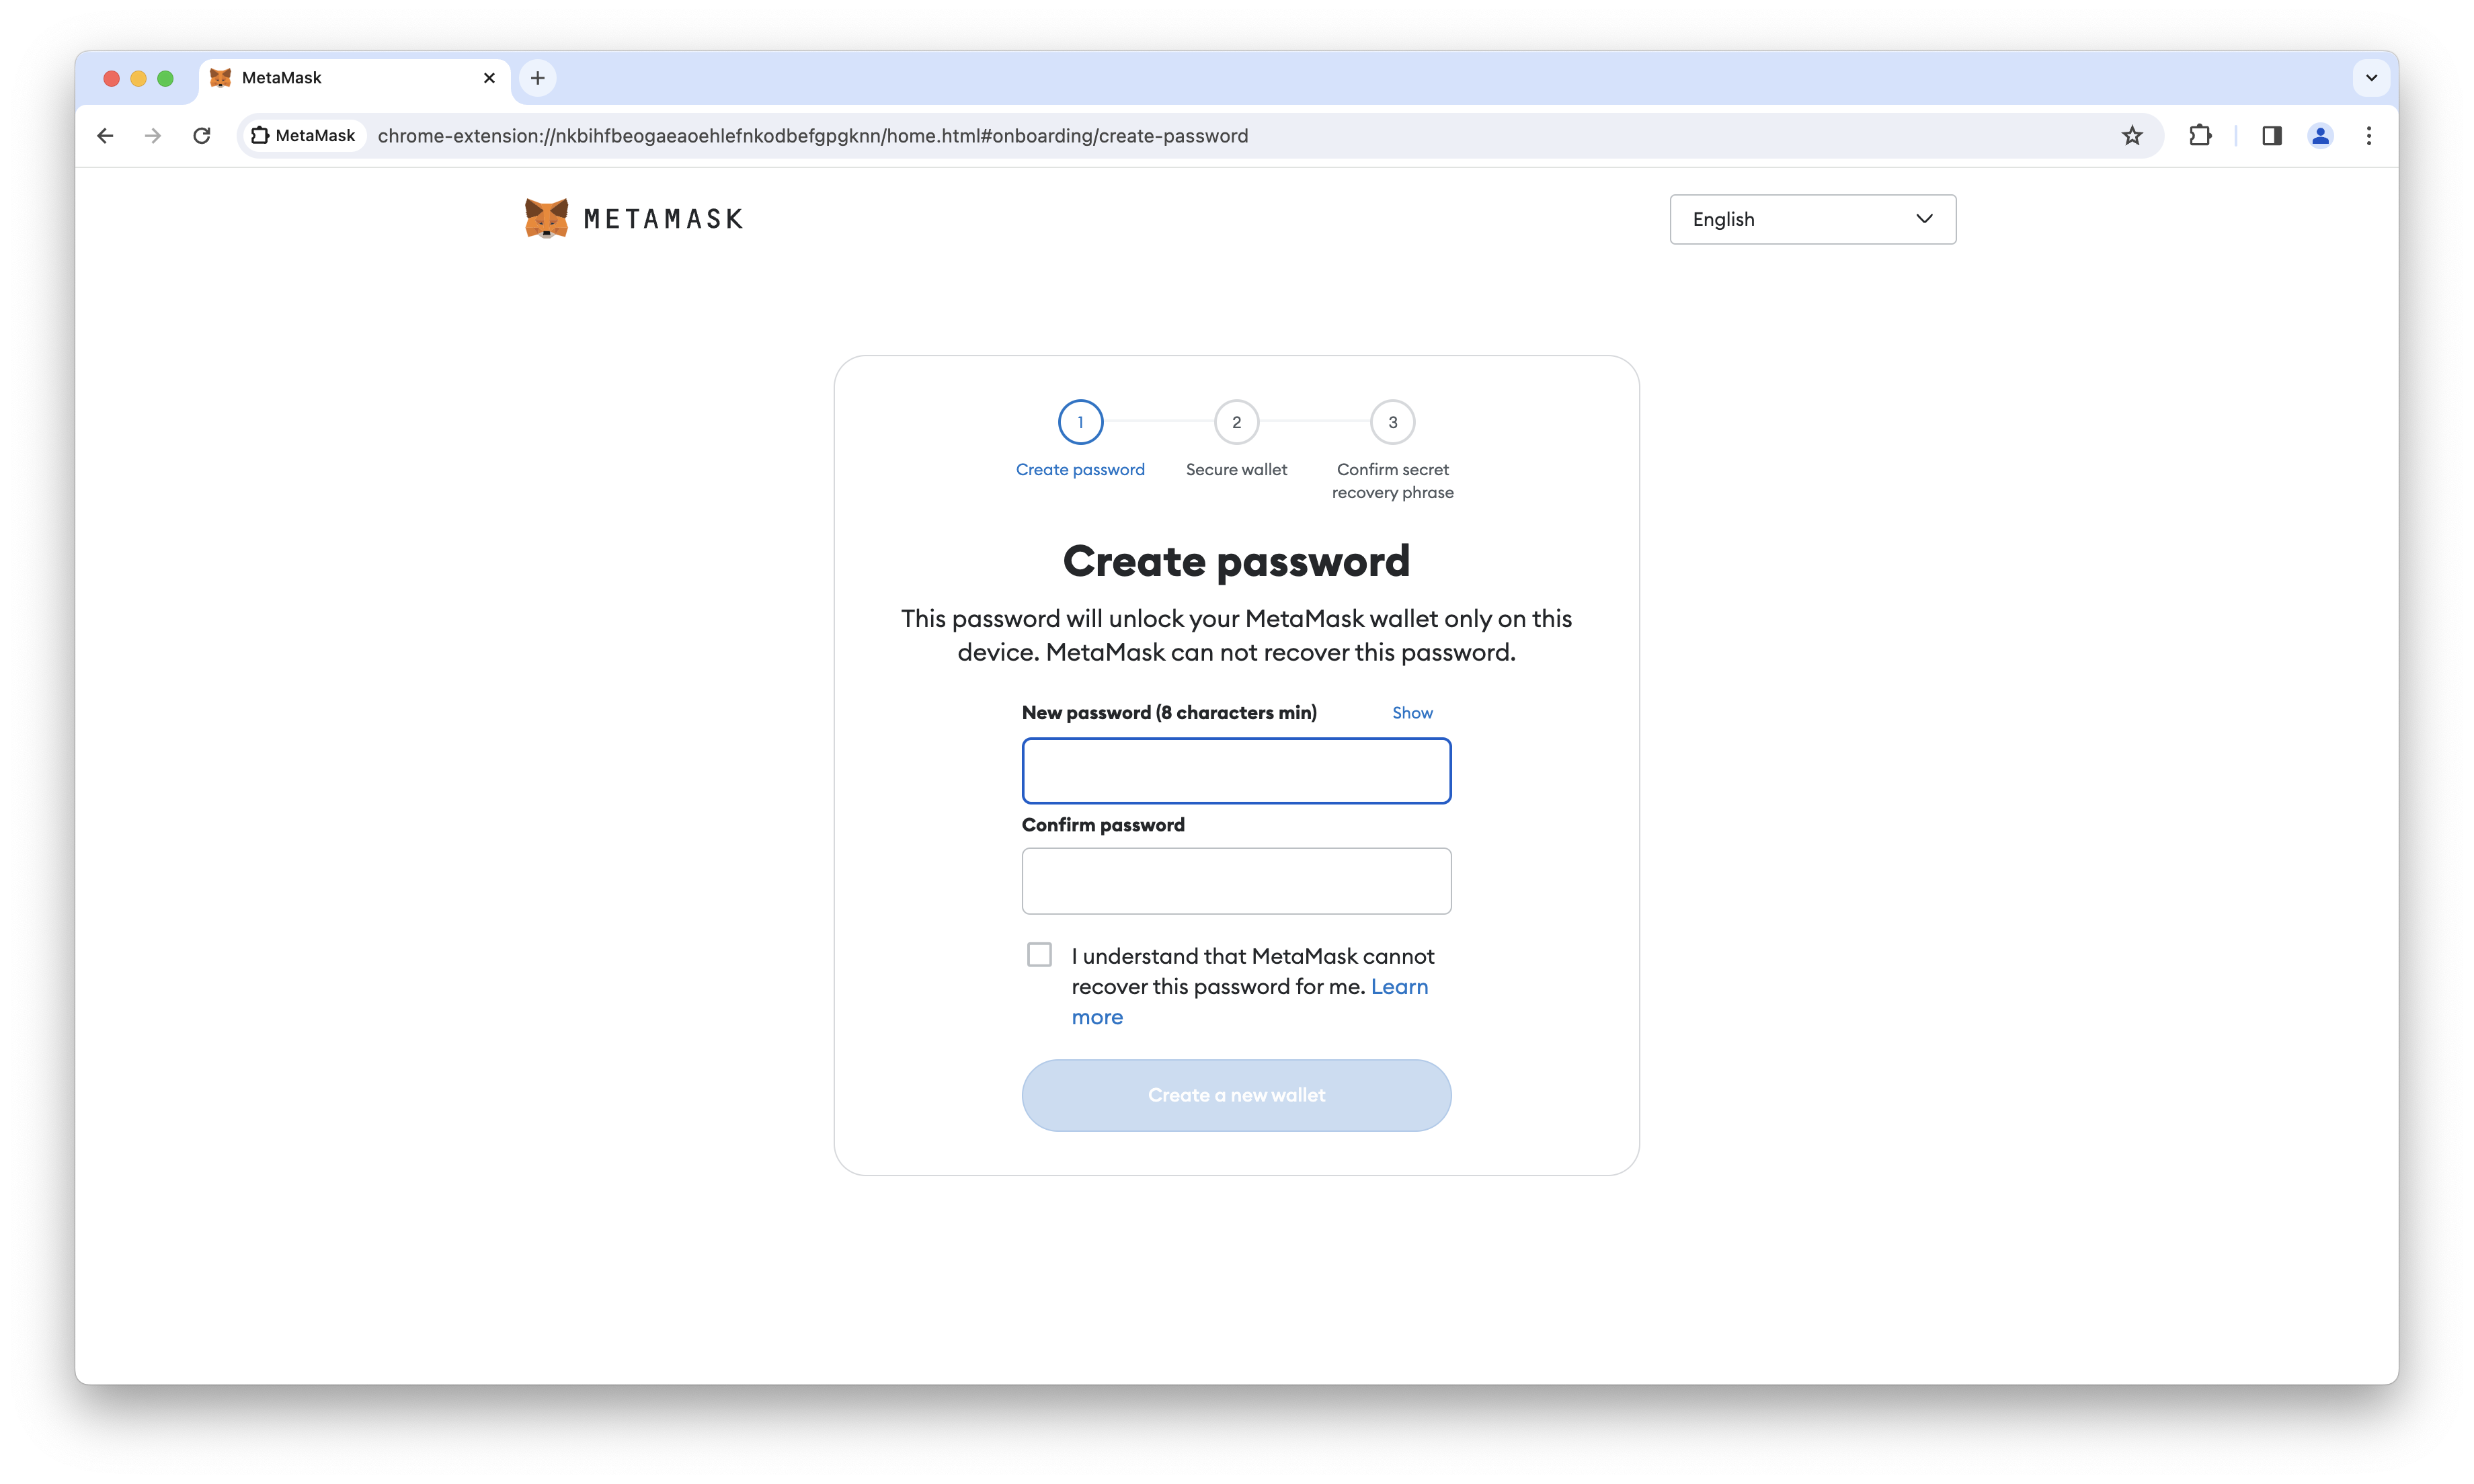
You’ll be asked to create a password for your wallet.
This password will be used to encrypt your wallet, so make sure it’s a strong one that you won’t forget.
You’ll be asked to confirm that you understand MetaMask cannot recover your password if you lose it.
You may want to store this password in a password manager.
Remember, browser-based wallets are great for development but are not the most secure option.
Consider looking into a hardware wallet if you’re planning to store a significant amount of ETH or ERC-20 tokens.
Once you’ve written down your password, click “Create a new wallet” to continue.
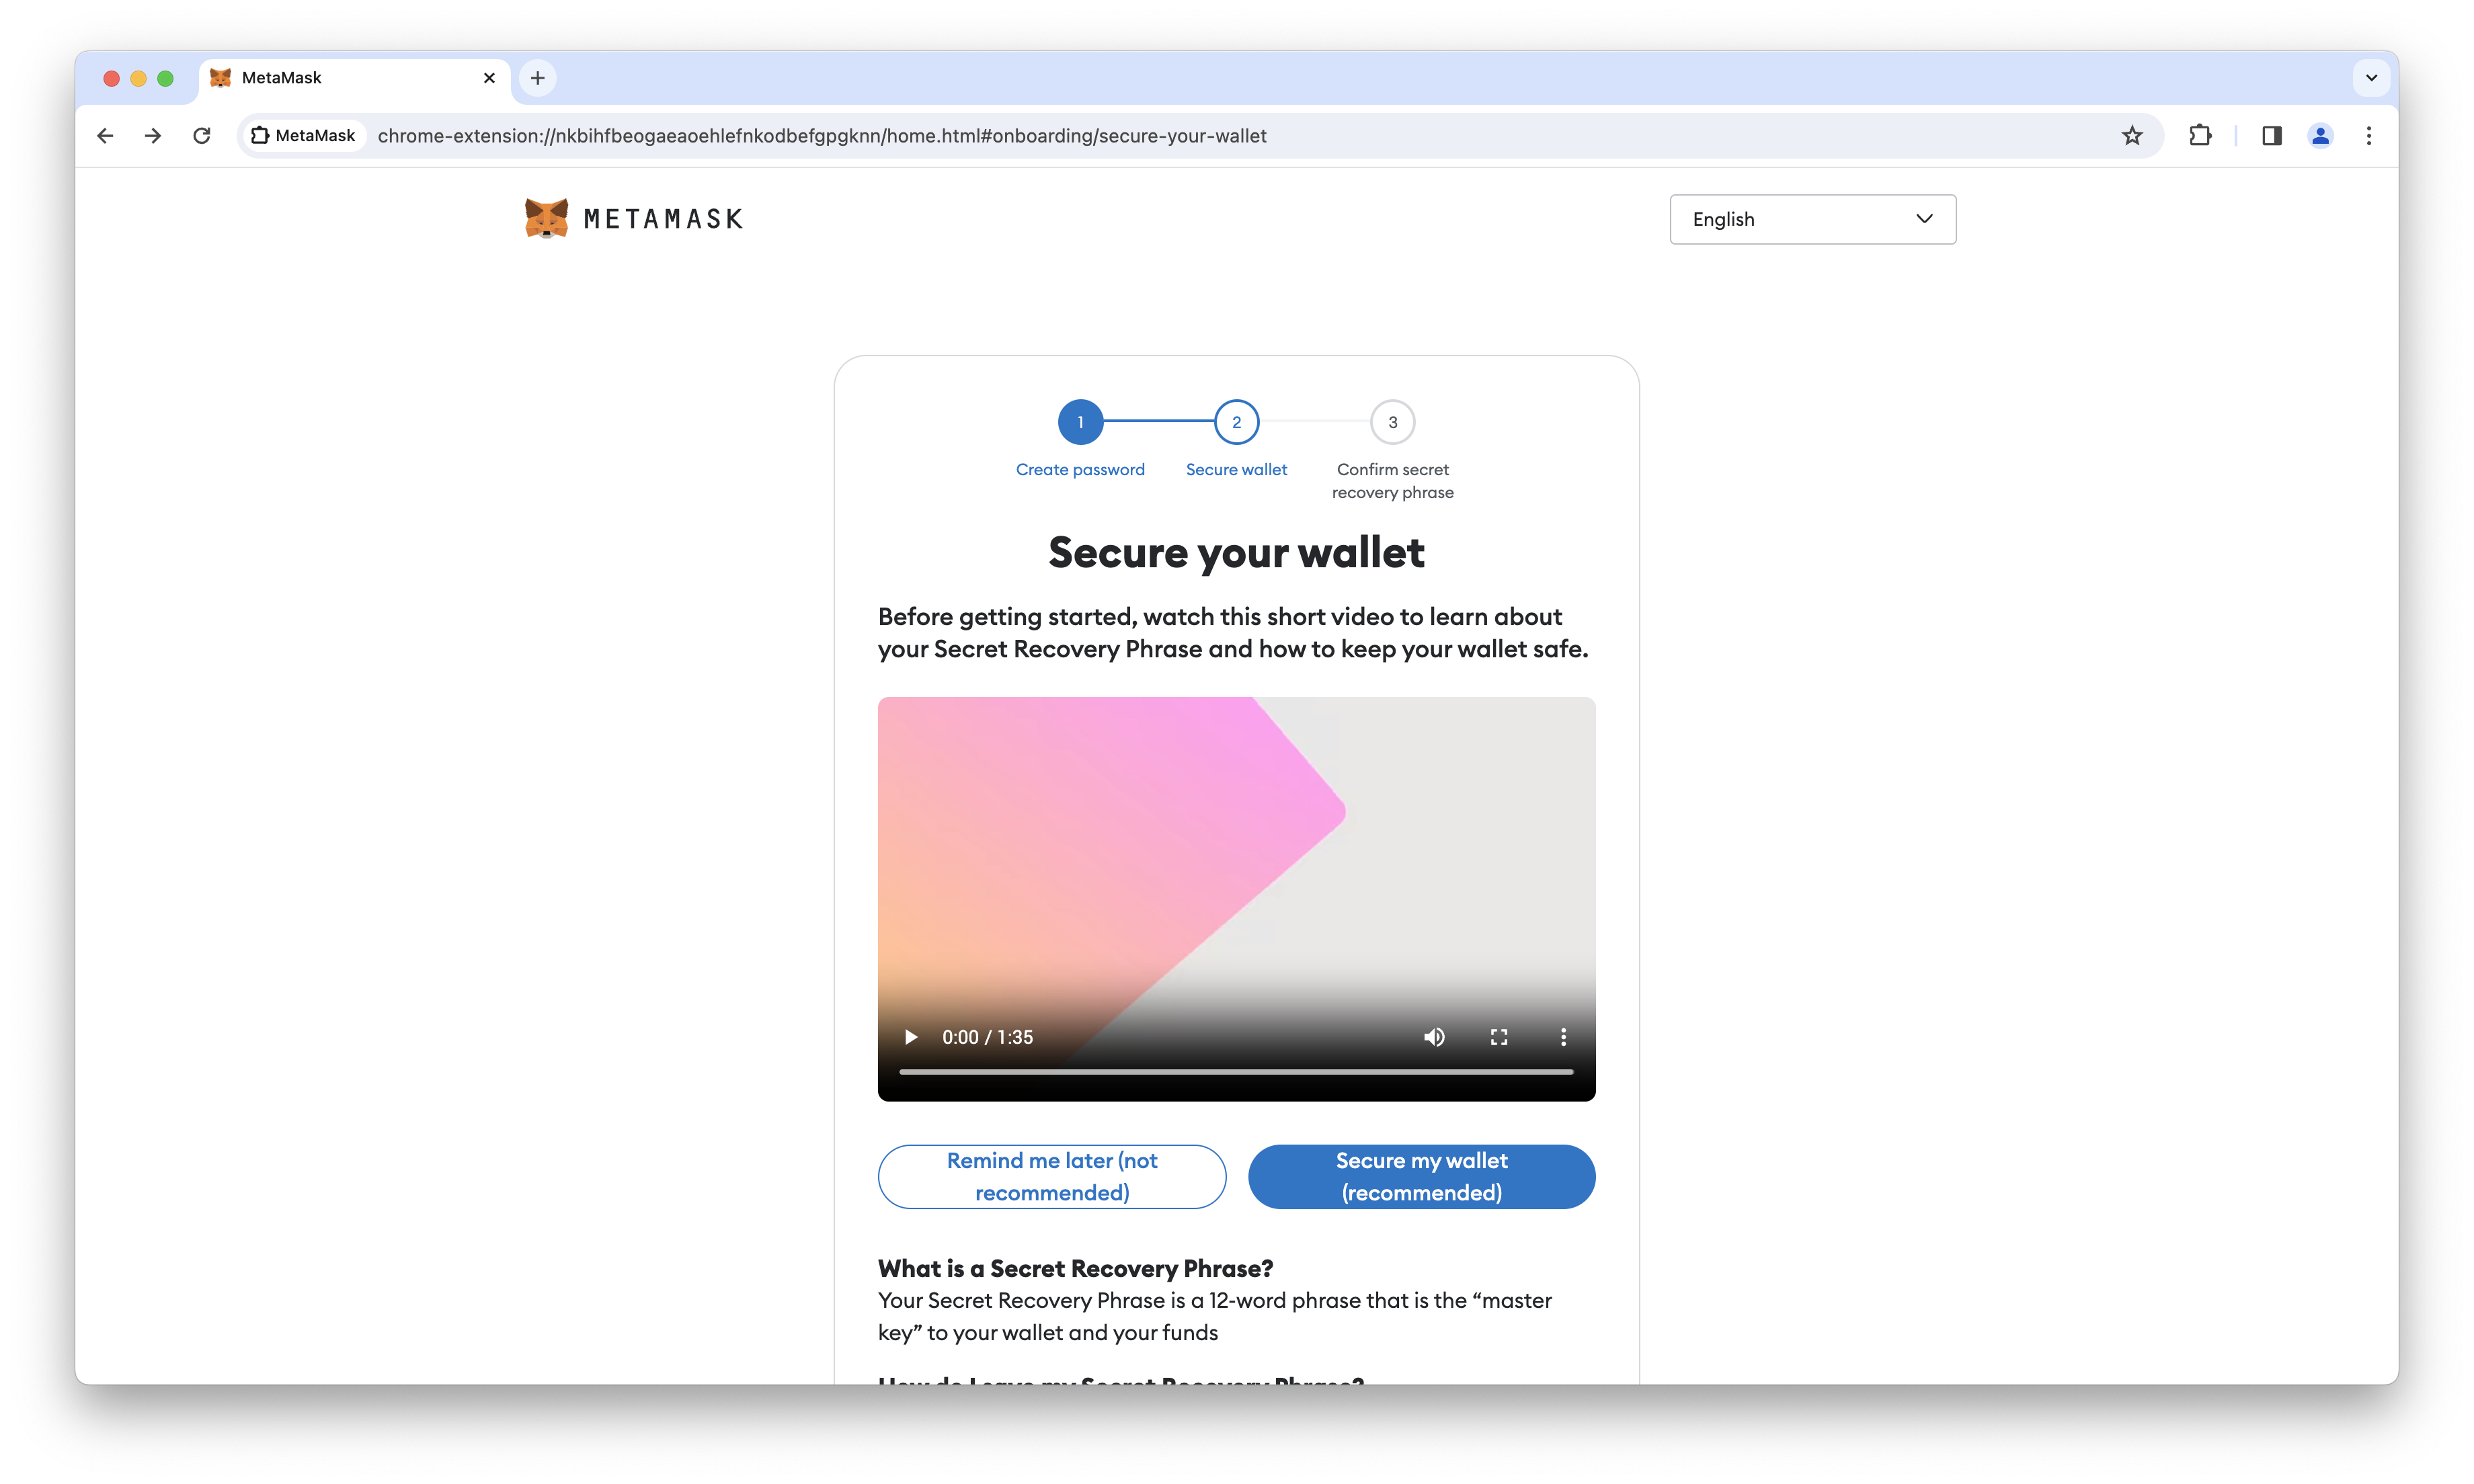
MetaMask will now show you a short video about wallet security.
If this is your first time using MetaMask or a browser-based wallet, it’s recommended that you watch the video.
You’ll be presented with the option to “Secure my wallet (recommended)” or “Remind me later (not recommended)“.
It’s strongly recommended to continue with the “Secure my wallet (recommended)” option.
This will prompt you to back up your wallet and might prevent you from losing access to your wallet down the line.
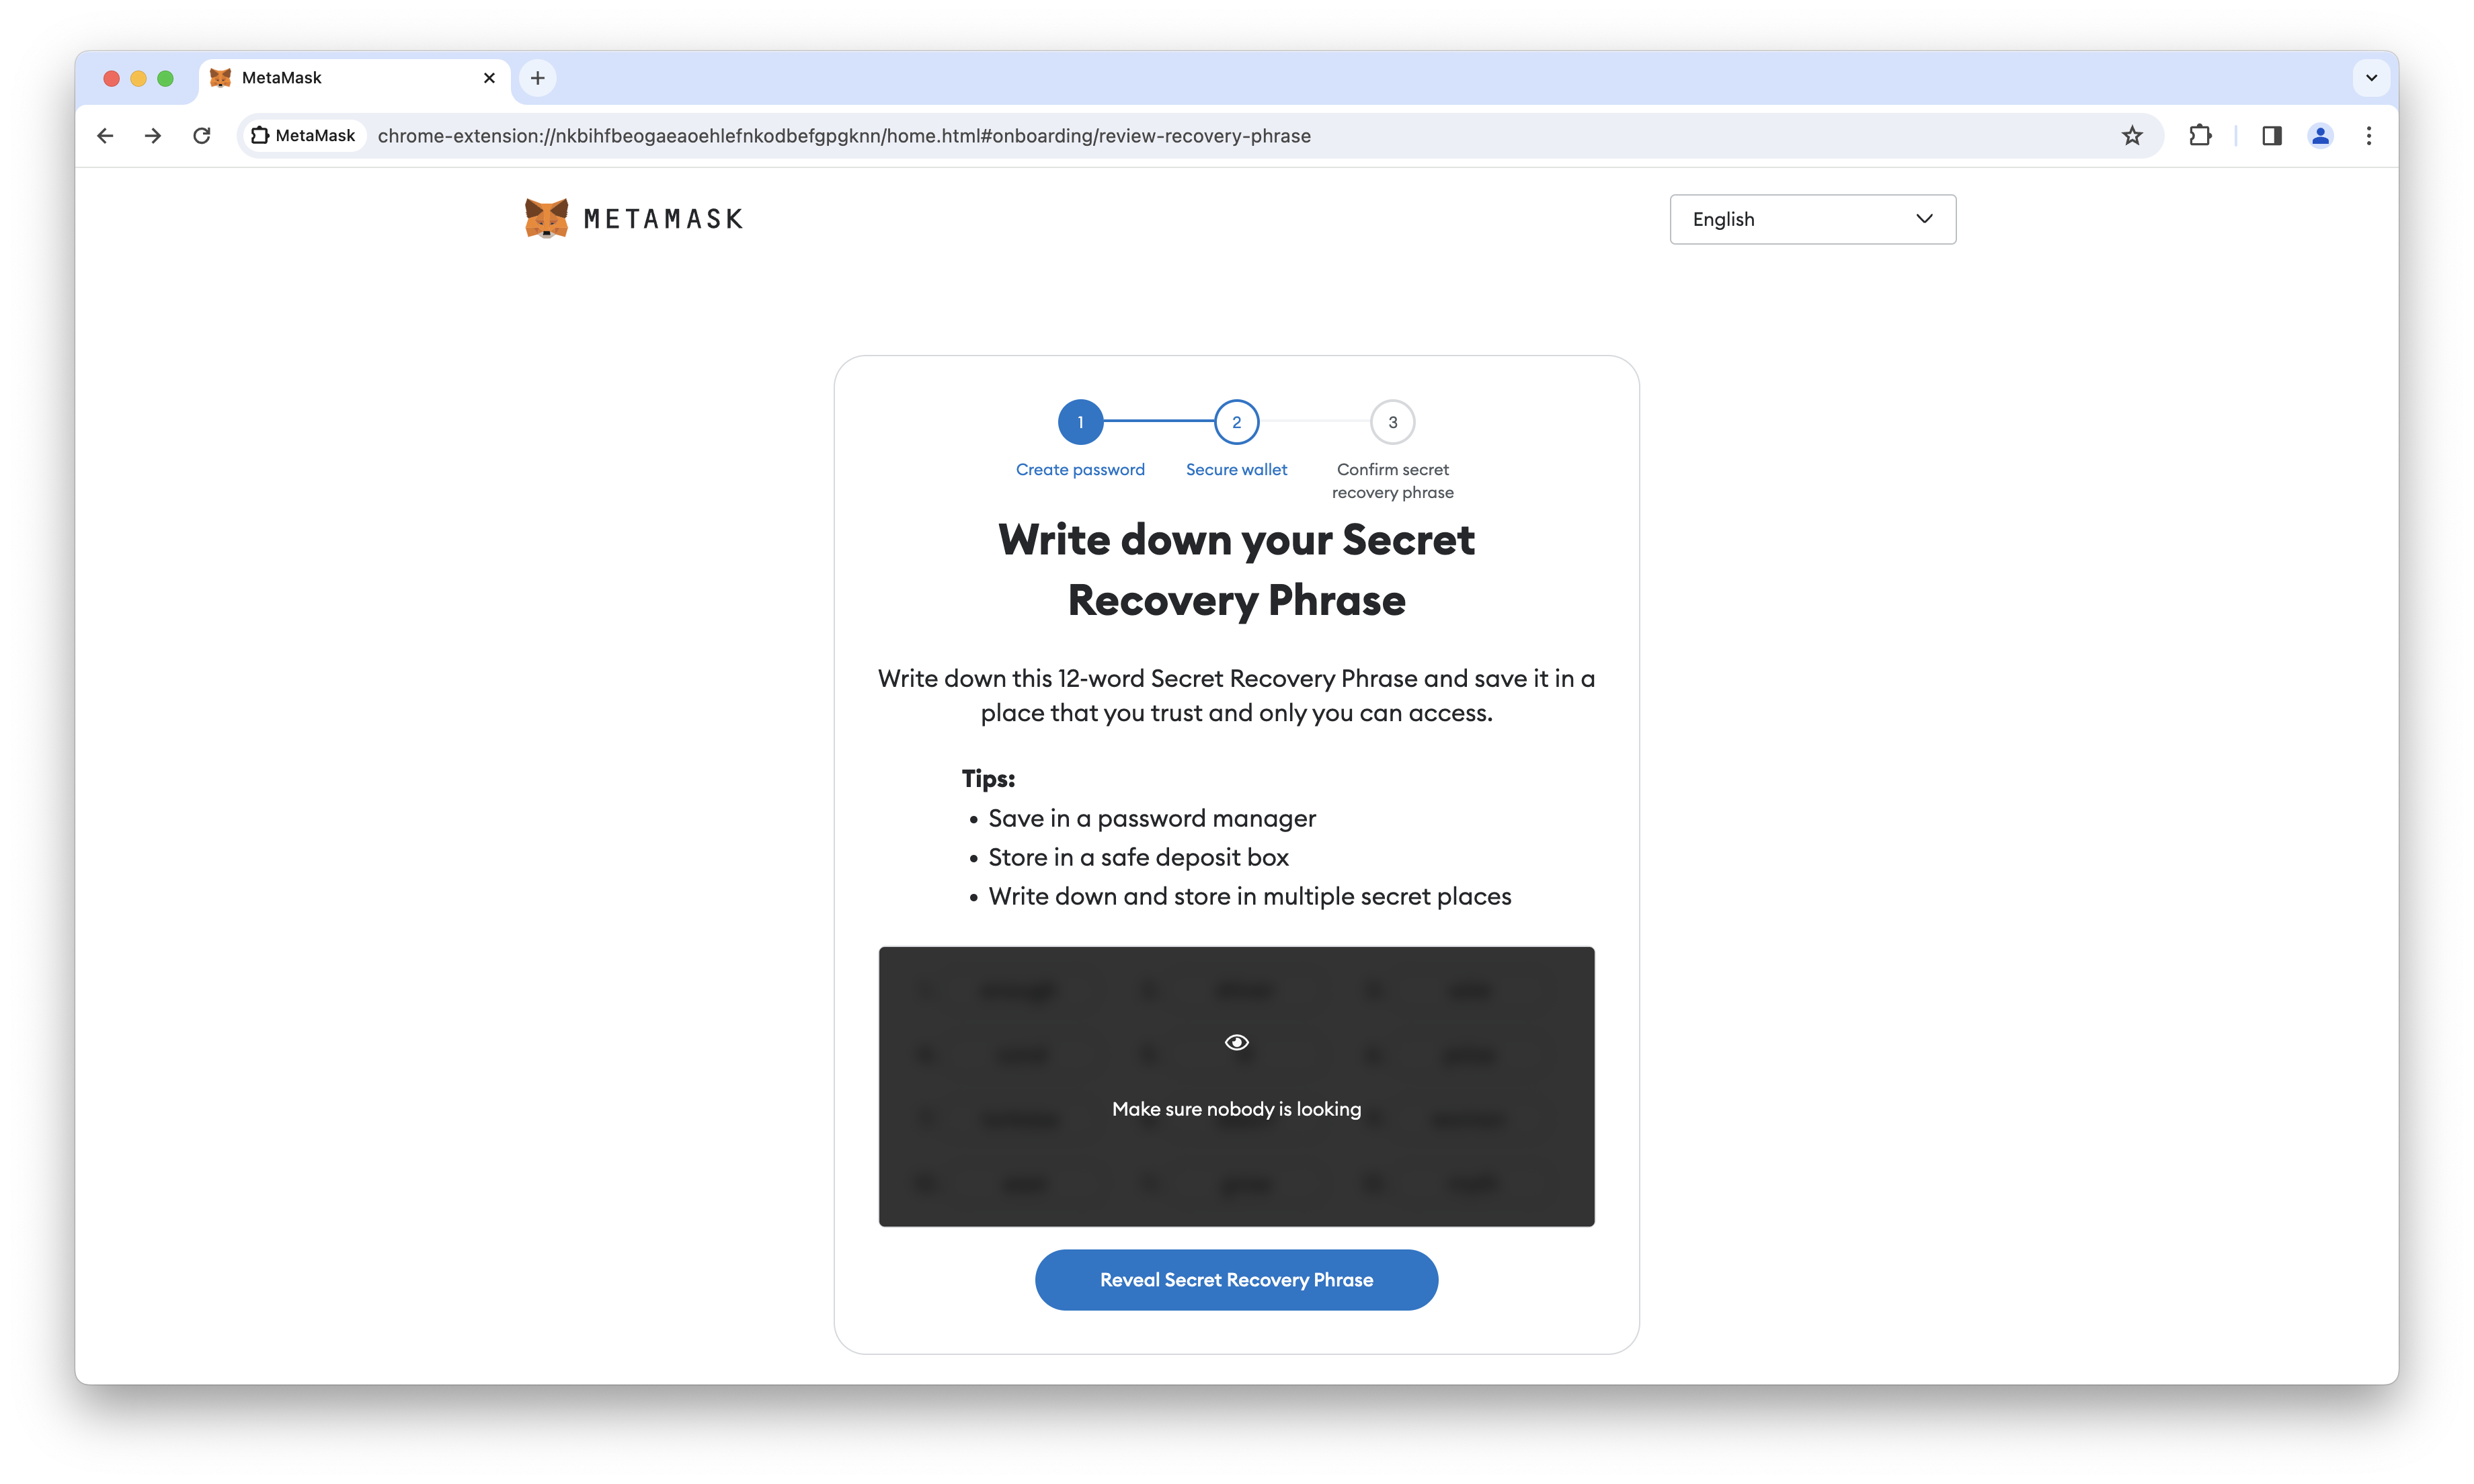
After continuing with “Secure my wallet (recommended)”, you’ll be asked to write down a 12 word secret recovery phrase.
This phrase can be used to recover your wallet if you lose your password or the browser extension somehow becomes corrupted.
Write these words down somewhere safe and keep them secret.
For a development wallet, it’s fine to keep the phrase in a password manager.
Just don’t place too much importance in this wallet.
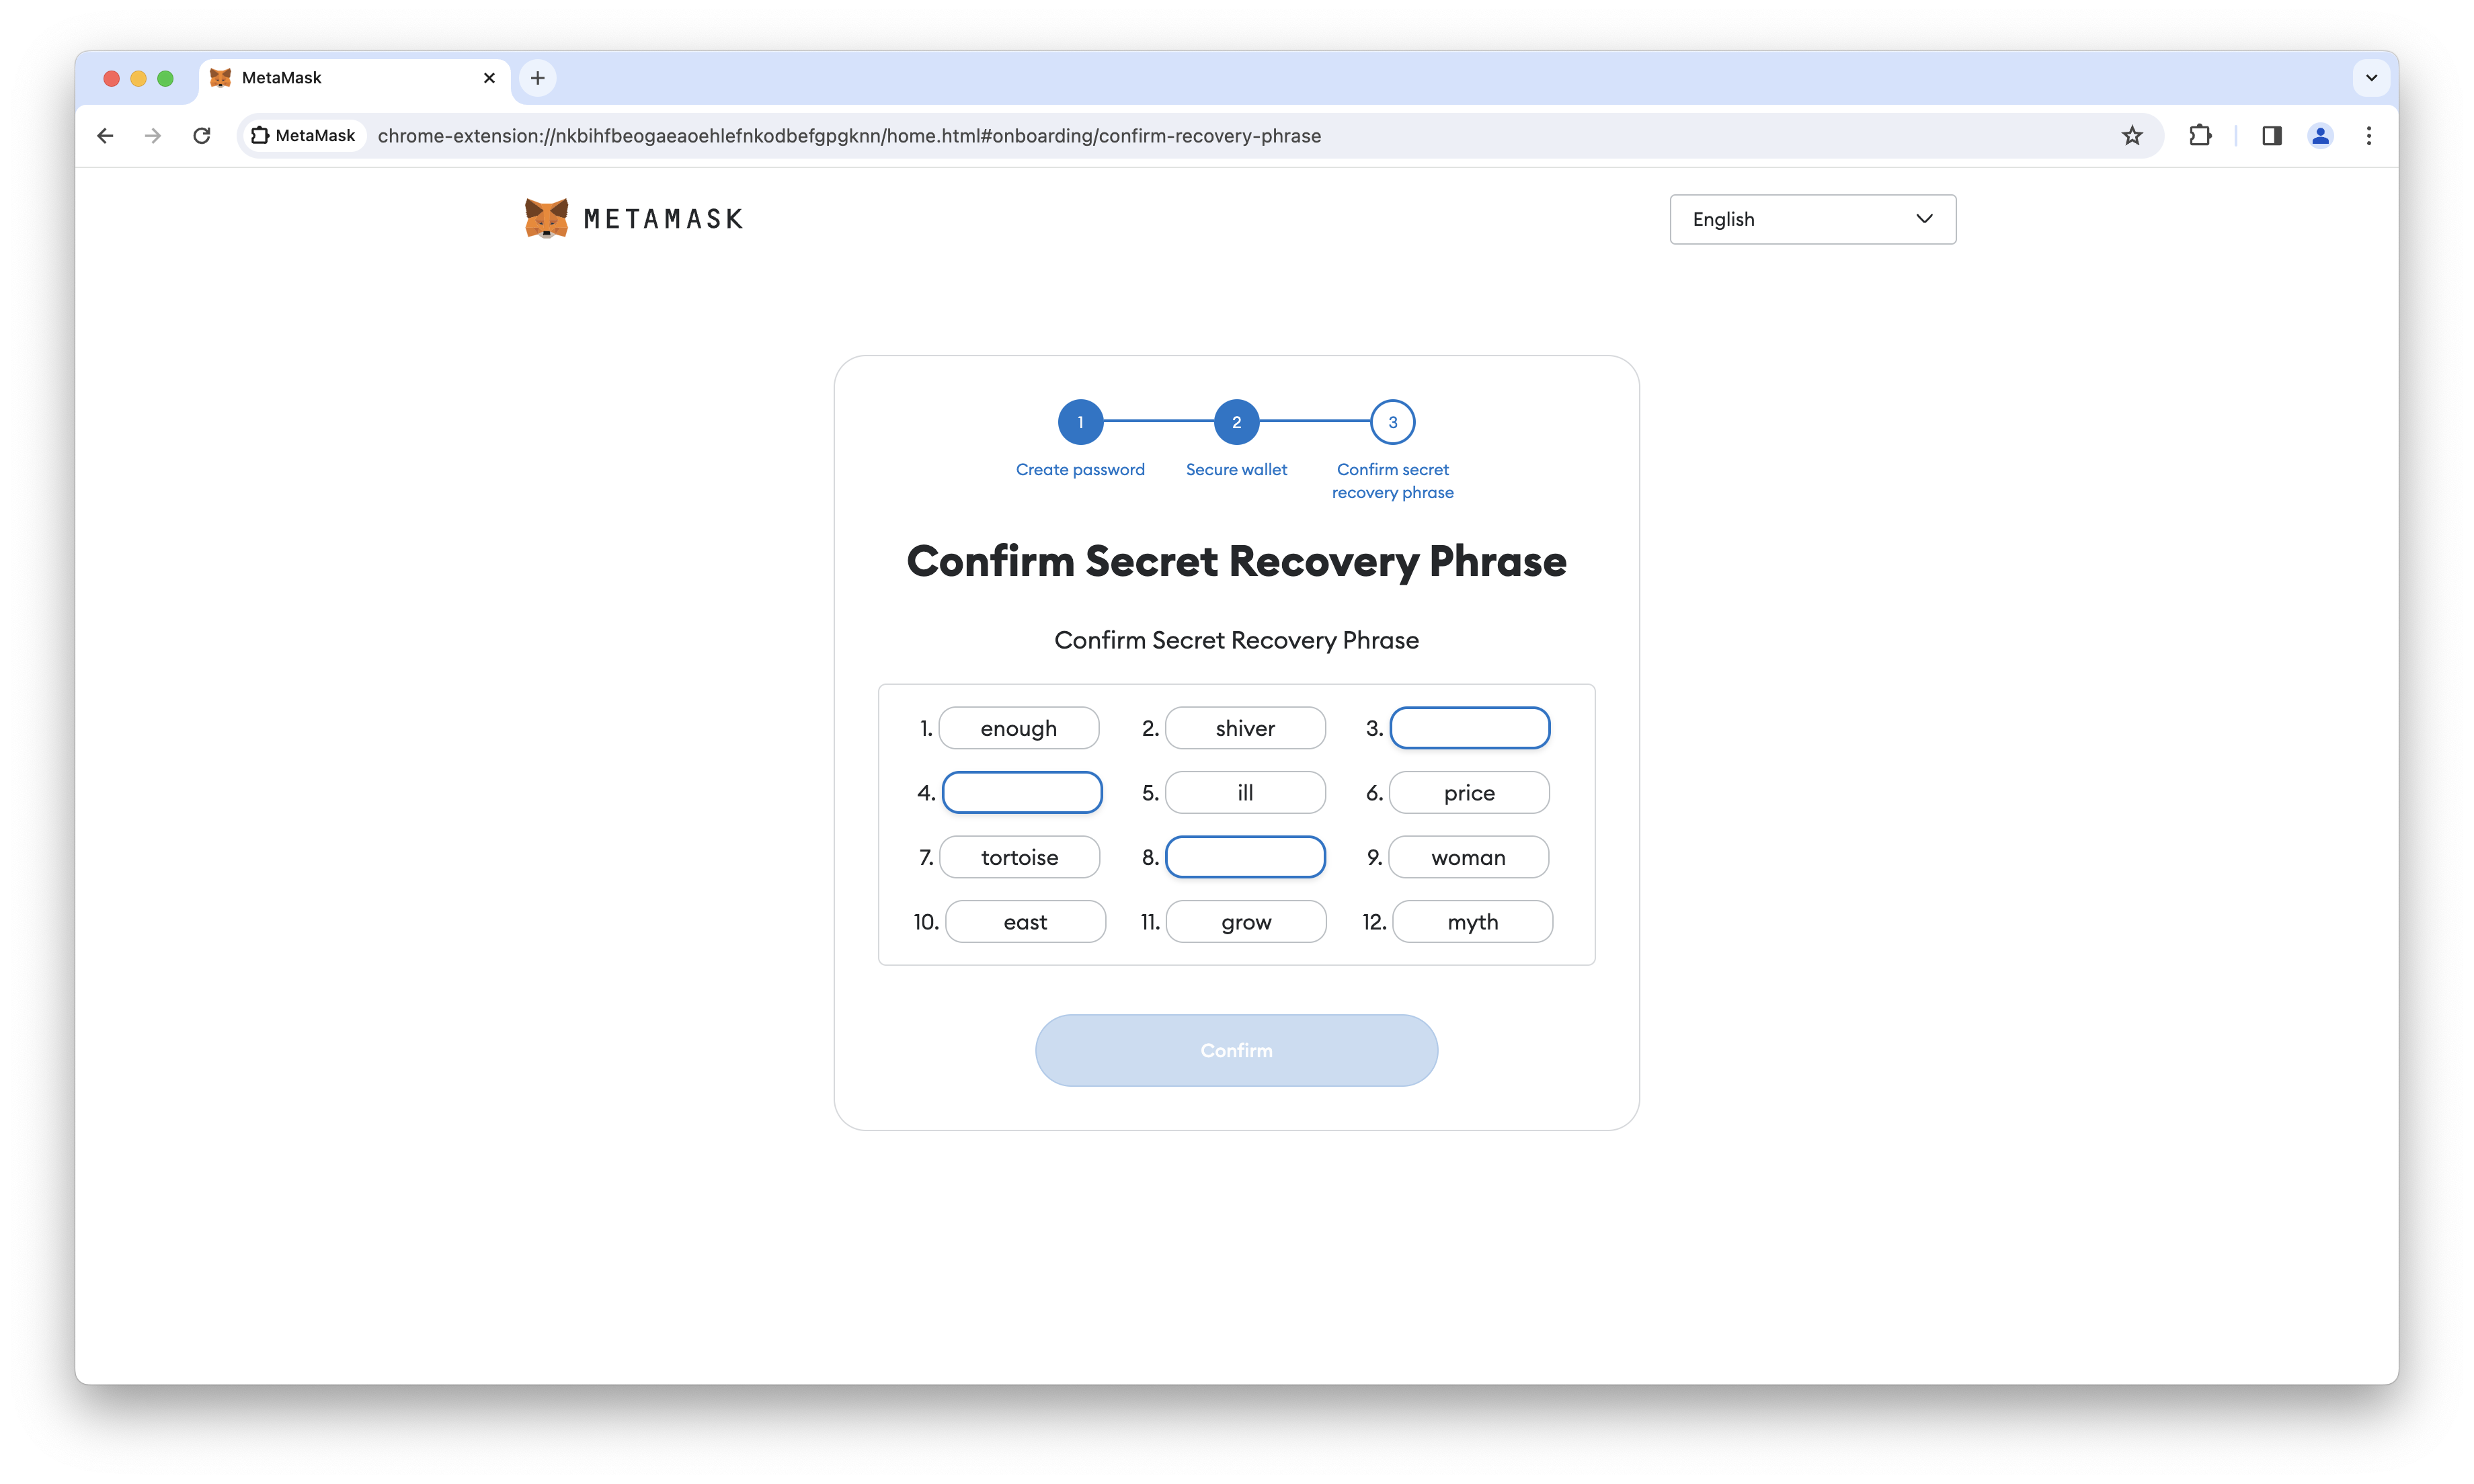
After writing down your secret recovery phrase, you’ll be asked to confirm it.
This is to make sure you wrote it down correctly.
MetaMask will ask you to input a few of the words you wrote down.
Make sure to input them in the correct order.
You’re all done!
Read through the final page to get some more tips from MetaMask, then click “Got it!” when you’re ready to continue.
This tutorial will show you how to deploy a smart contract to OP Sepolia, the testnet for Adventure Layer Testnet.
Once you know how to deploy a smart contract to OP Sepolia, you’ll be able to deploy a smart contract to Adventure Layer Testnet in exactly the same way.
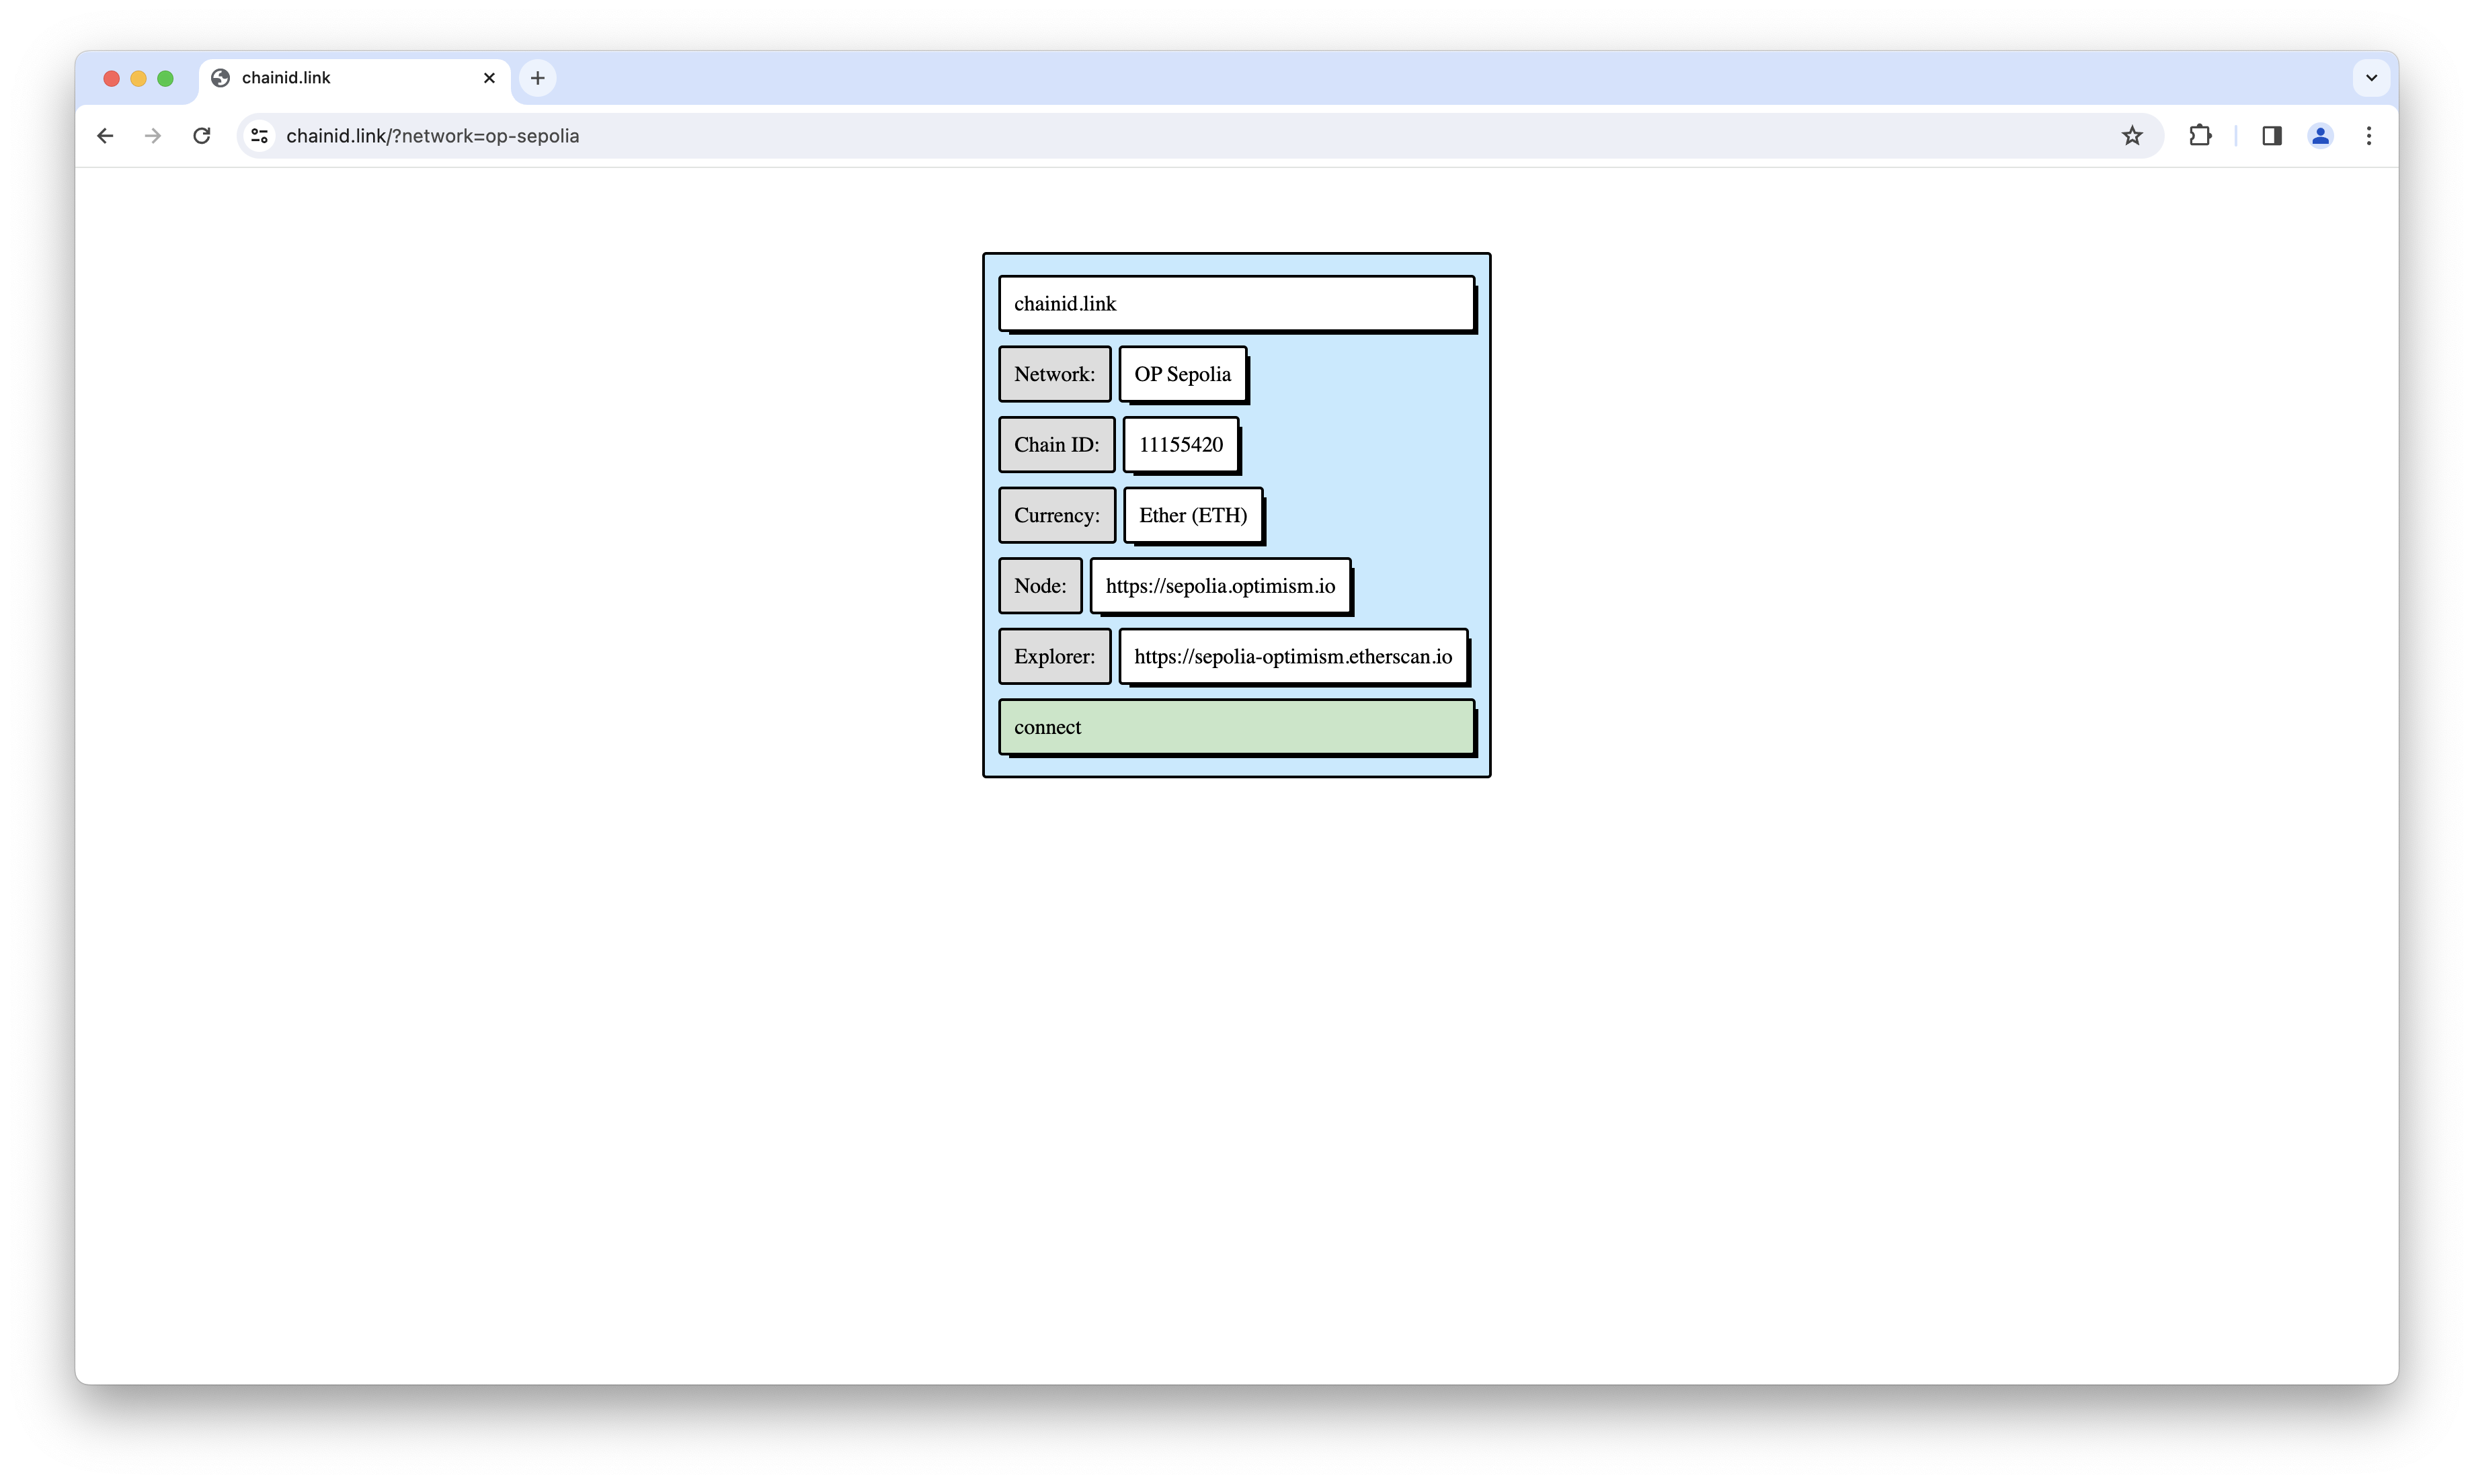
In order to interact with OP Sepolia using MetaMask, you’ll need to add it as a custom network.
Click
this link to open the OP Sepolia connection link.
This link will show you the connection details for OP Sepolia and give you the option to add it to MetaMask.
Once you’re ready to connect to OP Sepolia, click the “connect” button.
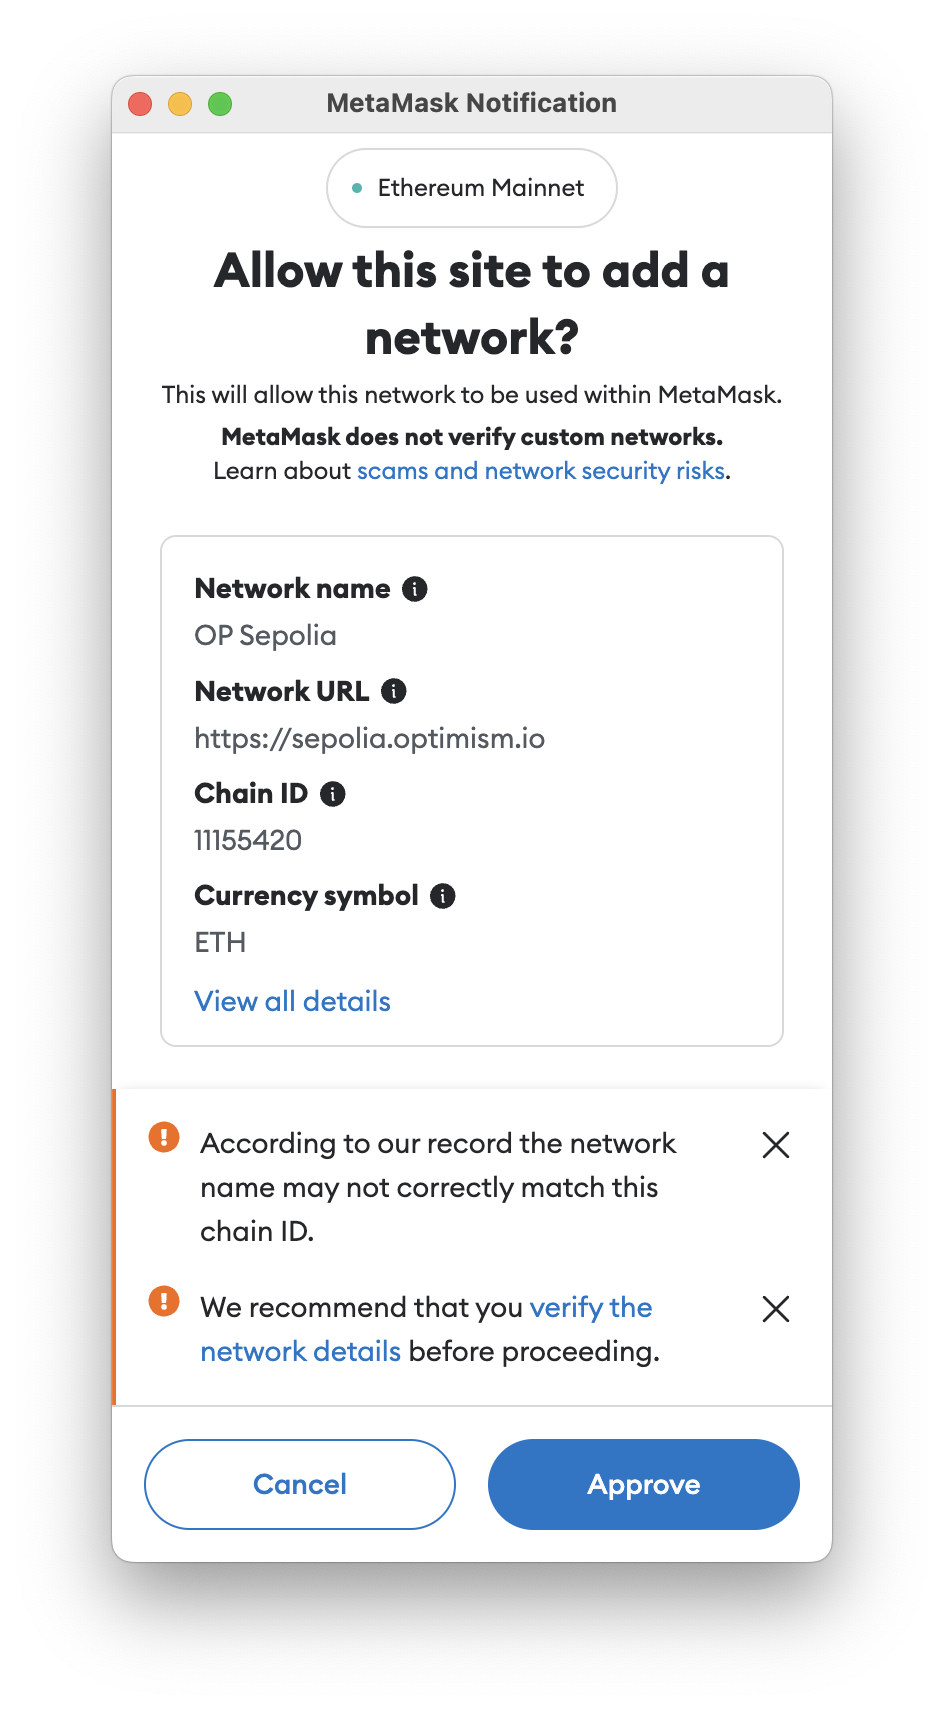
You’ll be presented with a popup from MetaMask asking if you’d like to add the network.
Click “Approve” to add OP Sepolia to MetaMask.
After you approve the network, MetaMask will automatically try to switch to the OP Sepolia network.
Click “Switch network” to continue.
Get ETH on OP Sepolia
You’ll need some ETH on OP Sepolia to pay for the gas fees associated with deploying a smart contract.
You can use the Adventure Layer Superchain Faucet to get some free ETH on OP Sepolia.
Check Your Wallet Balance
After you get some ETH on OP Sepolia, you can check your wallet balance in MetaMask.
Make sure that your balance has updated before continuing.
If you don’t see any ETH in your wallet, double check that your MetaMask is connected to the OP Sepolia network.
Write Your First Contract
The most popular smart contract development language today is Solidity.
In this tutorial, you’ll be using a browser-based integrated development environment (IDE) called Remix.
Remix is a great tool for learning Solidity because it requires minimal setup and runs in your browser.
Head over to
remix.ethereum.org to open Remix.
You’ll be presented with a welcome screen and a popup asking if you’d like to share usage data with Remix.
Accept or decline this request depending on your preferences.
Remix has a small built-in tutorial that will walk you through the basics of the IDE.
Click the “Next” button to step through the tutorial.
Read through the tips to get a sense of the IDE.
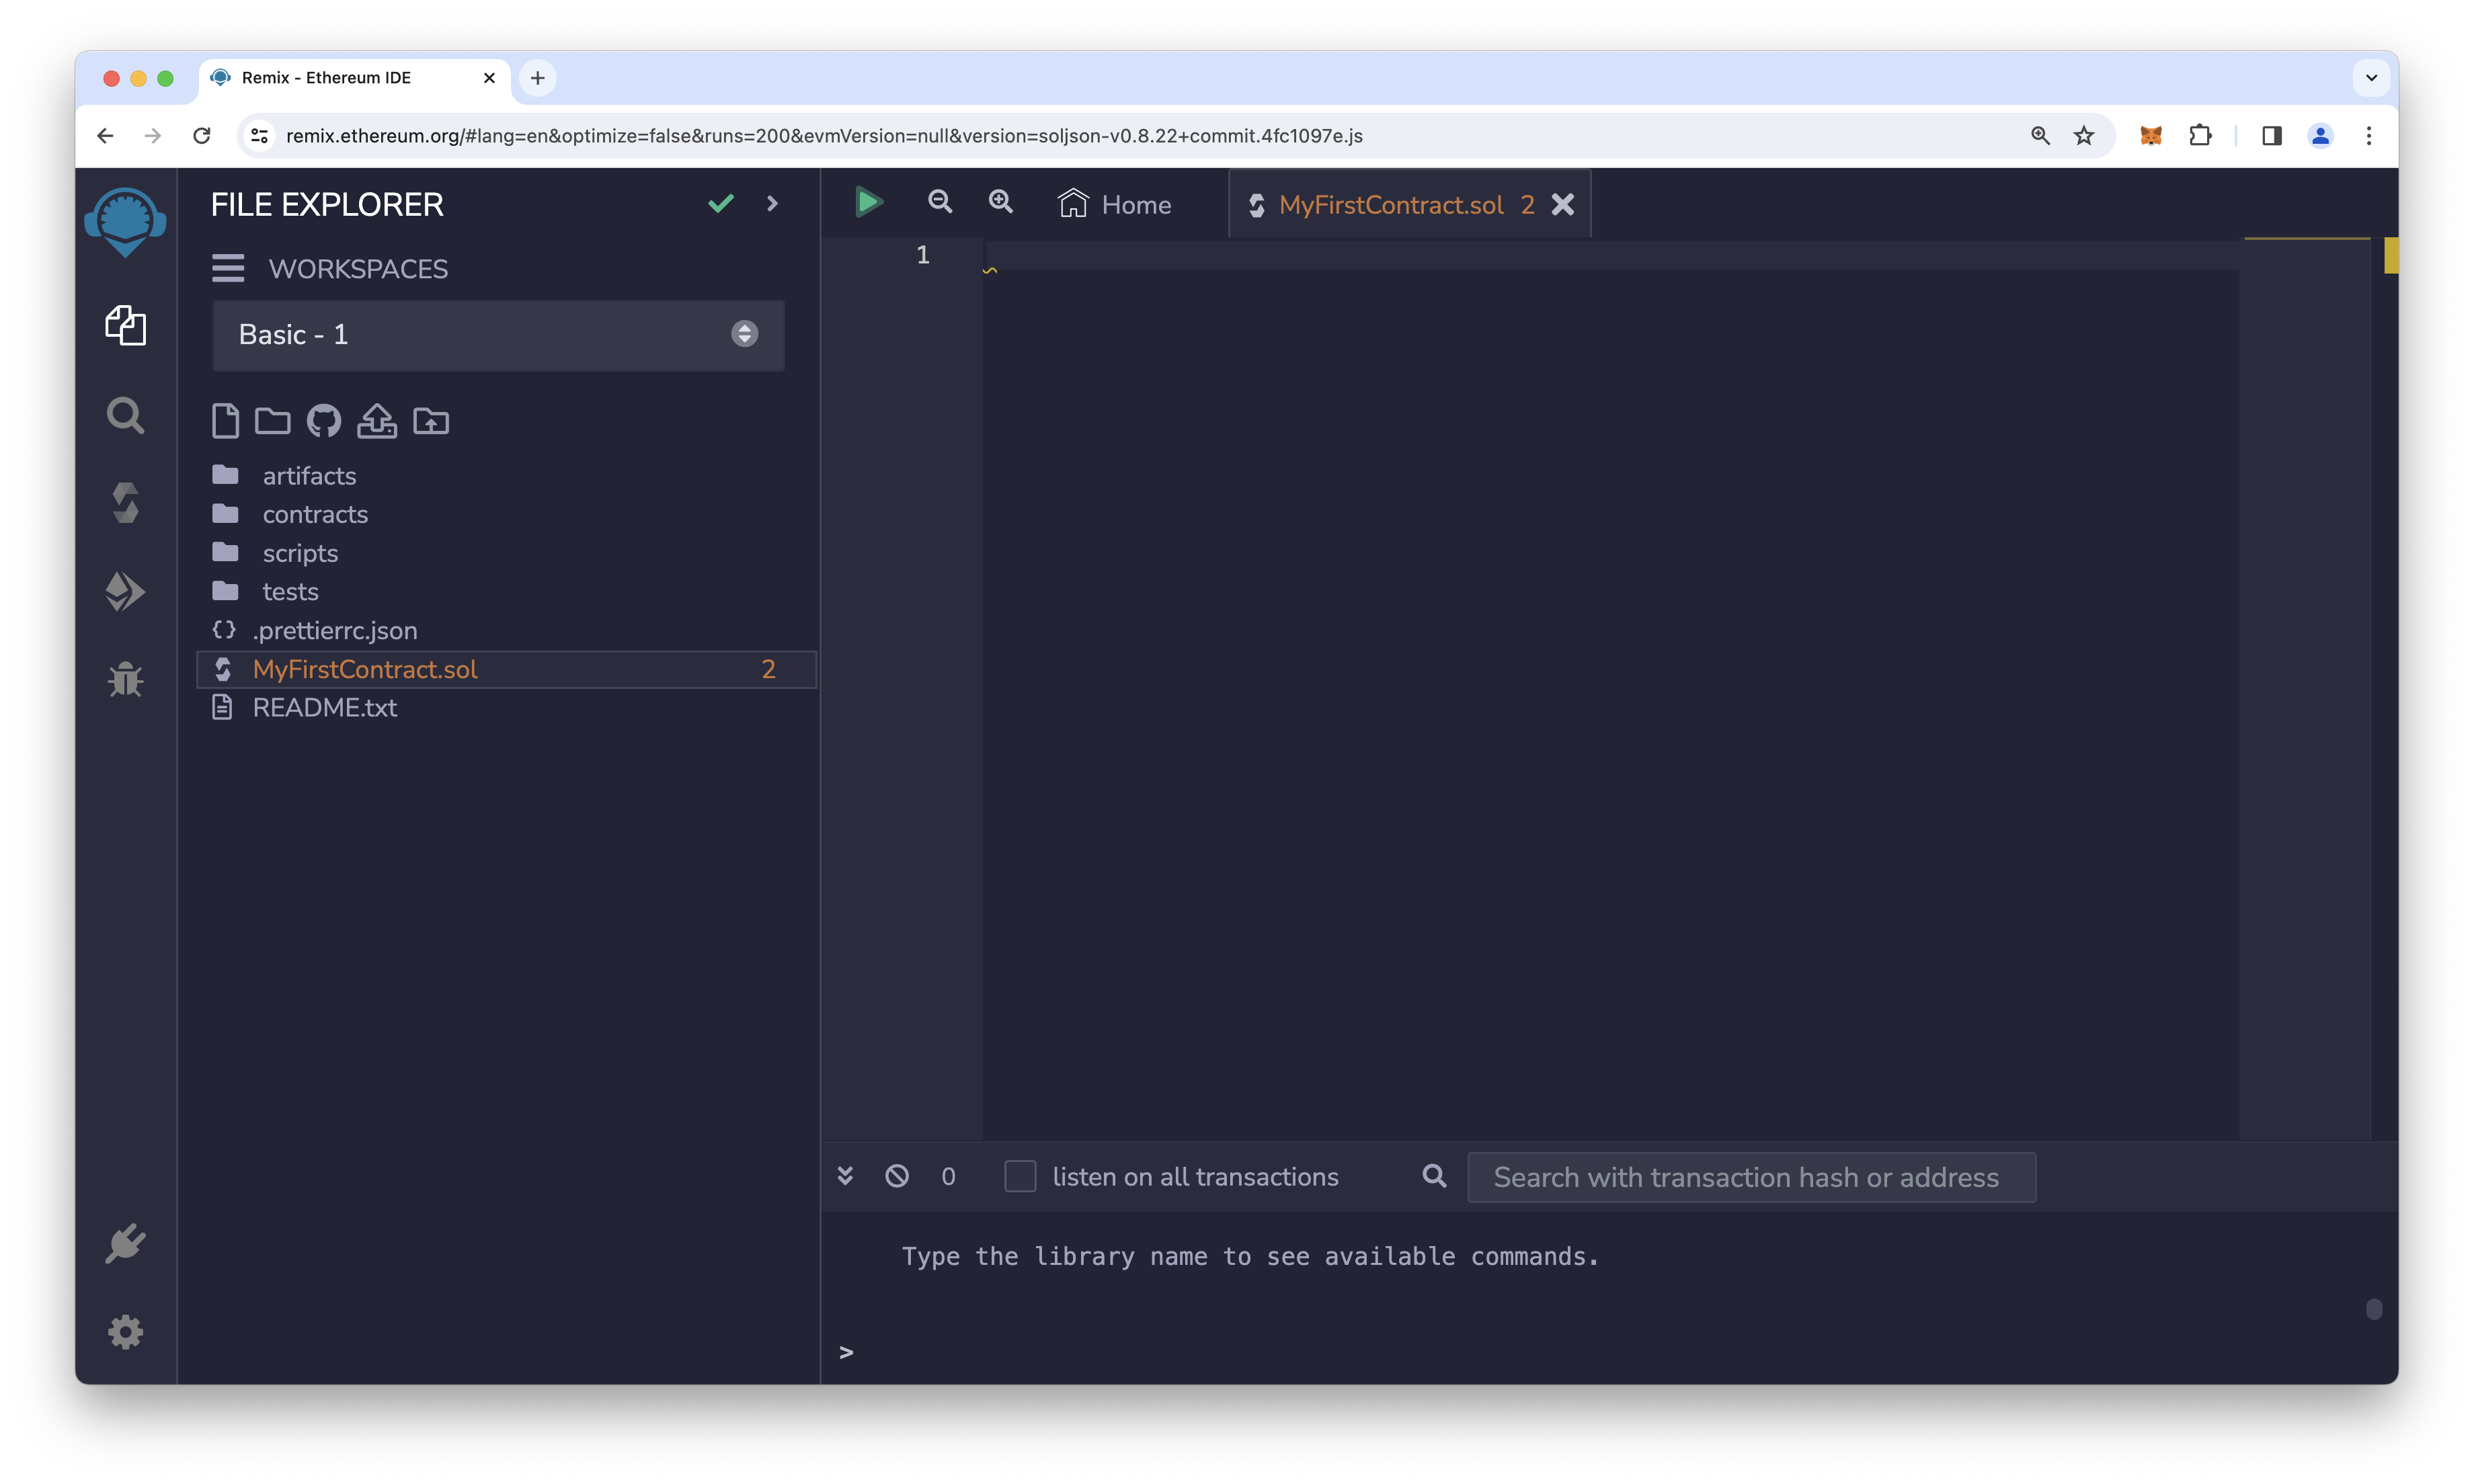
Click on the “File” icon in the left sidebar to create a new file.
Name the file “MyFirstContract.sol” and hit enter to create it.
This tutorial will show you how to deploy a simple contract that has a storage variable you can read and write.
You’ll be able to update this variable with a transaction and then retrieve the updated value.
This is just a simple example to get you started.
Solidity is a powerful language that can be used to write complex smart contracts, check out the
Next Steps section below after you’ve finished this tutorial for some more advanced examples!
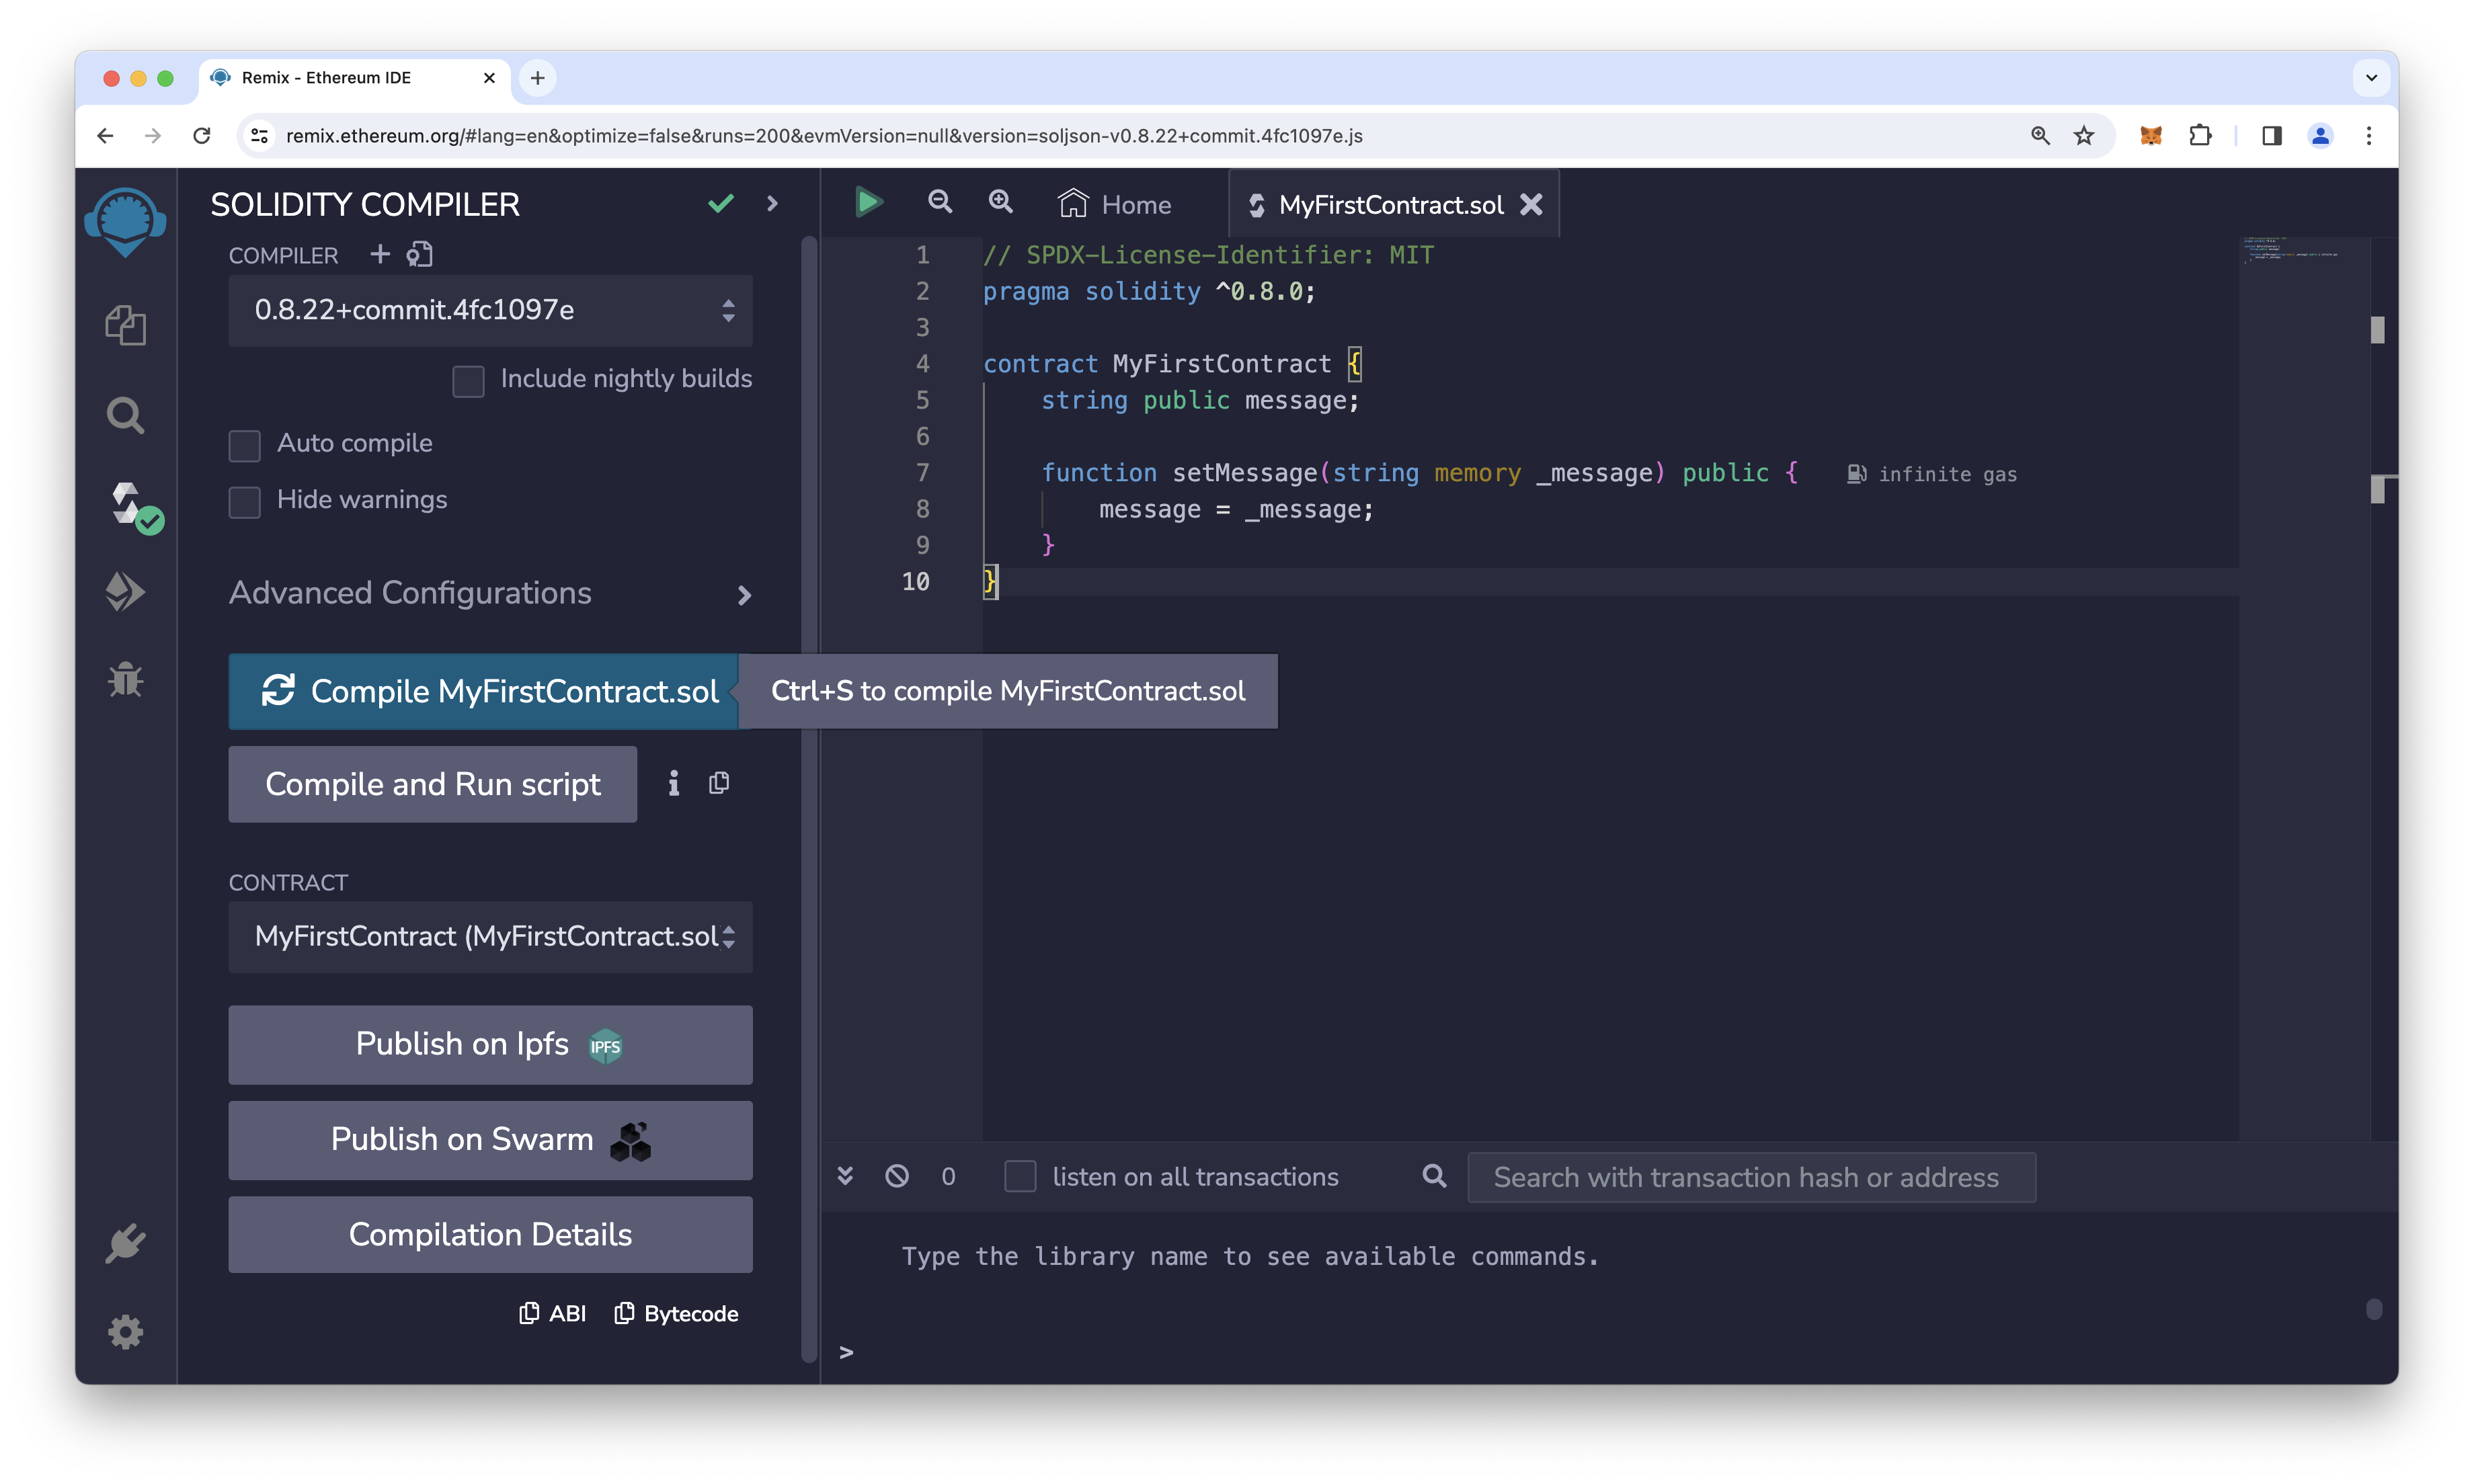
Copy and paste the following code into the file you just created.
Remix will detect copy/pasted code and give you a warning about it.
This is meant to prevent you from accidentally running malicious code.
Always be careful when copy/pasting code from the internet!
By default, Remix will automatically compile your contract when you save it.
You can also manually compile your contract by clicking the “Solidity Compiler” icon in the left sidebar and then clicking the “Compile” button.
It’s usually easier to leave automatic compilation enabled.
You shouldn’t see any compilation errors for this contract.
Deploy Your Contract
Now that you’ve written your first contract, you can deploy it to OP Sepolia.
Deploying contracts with Remix is pretty straightforward.
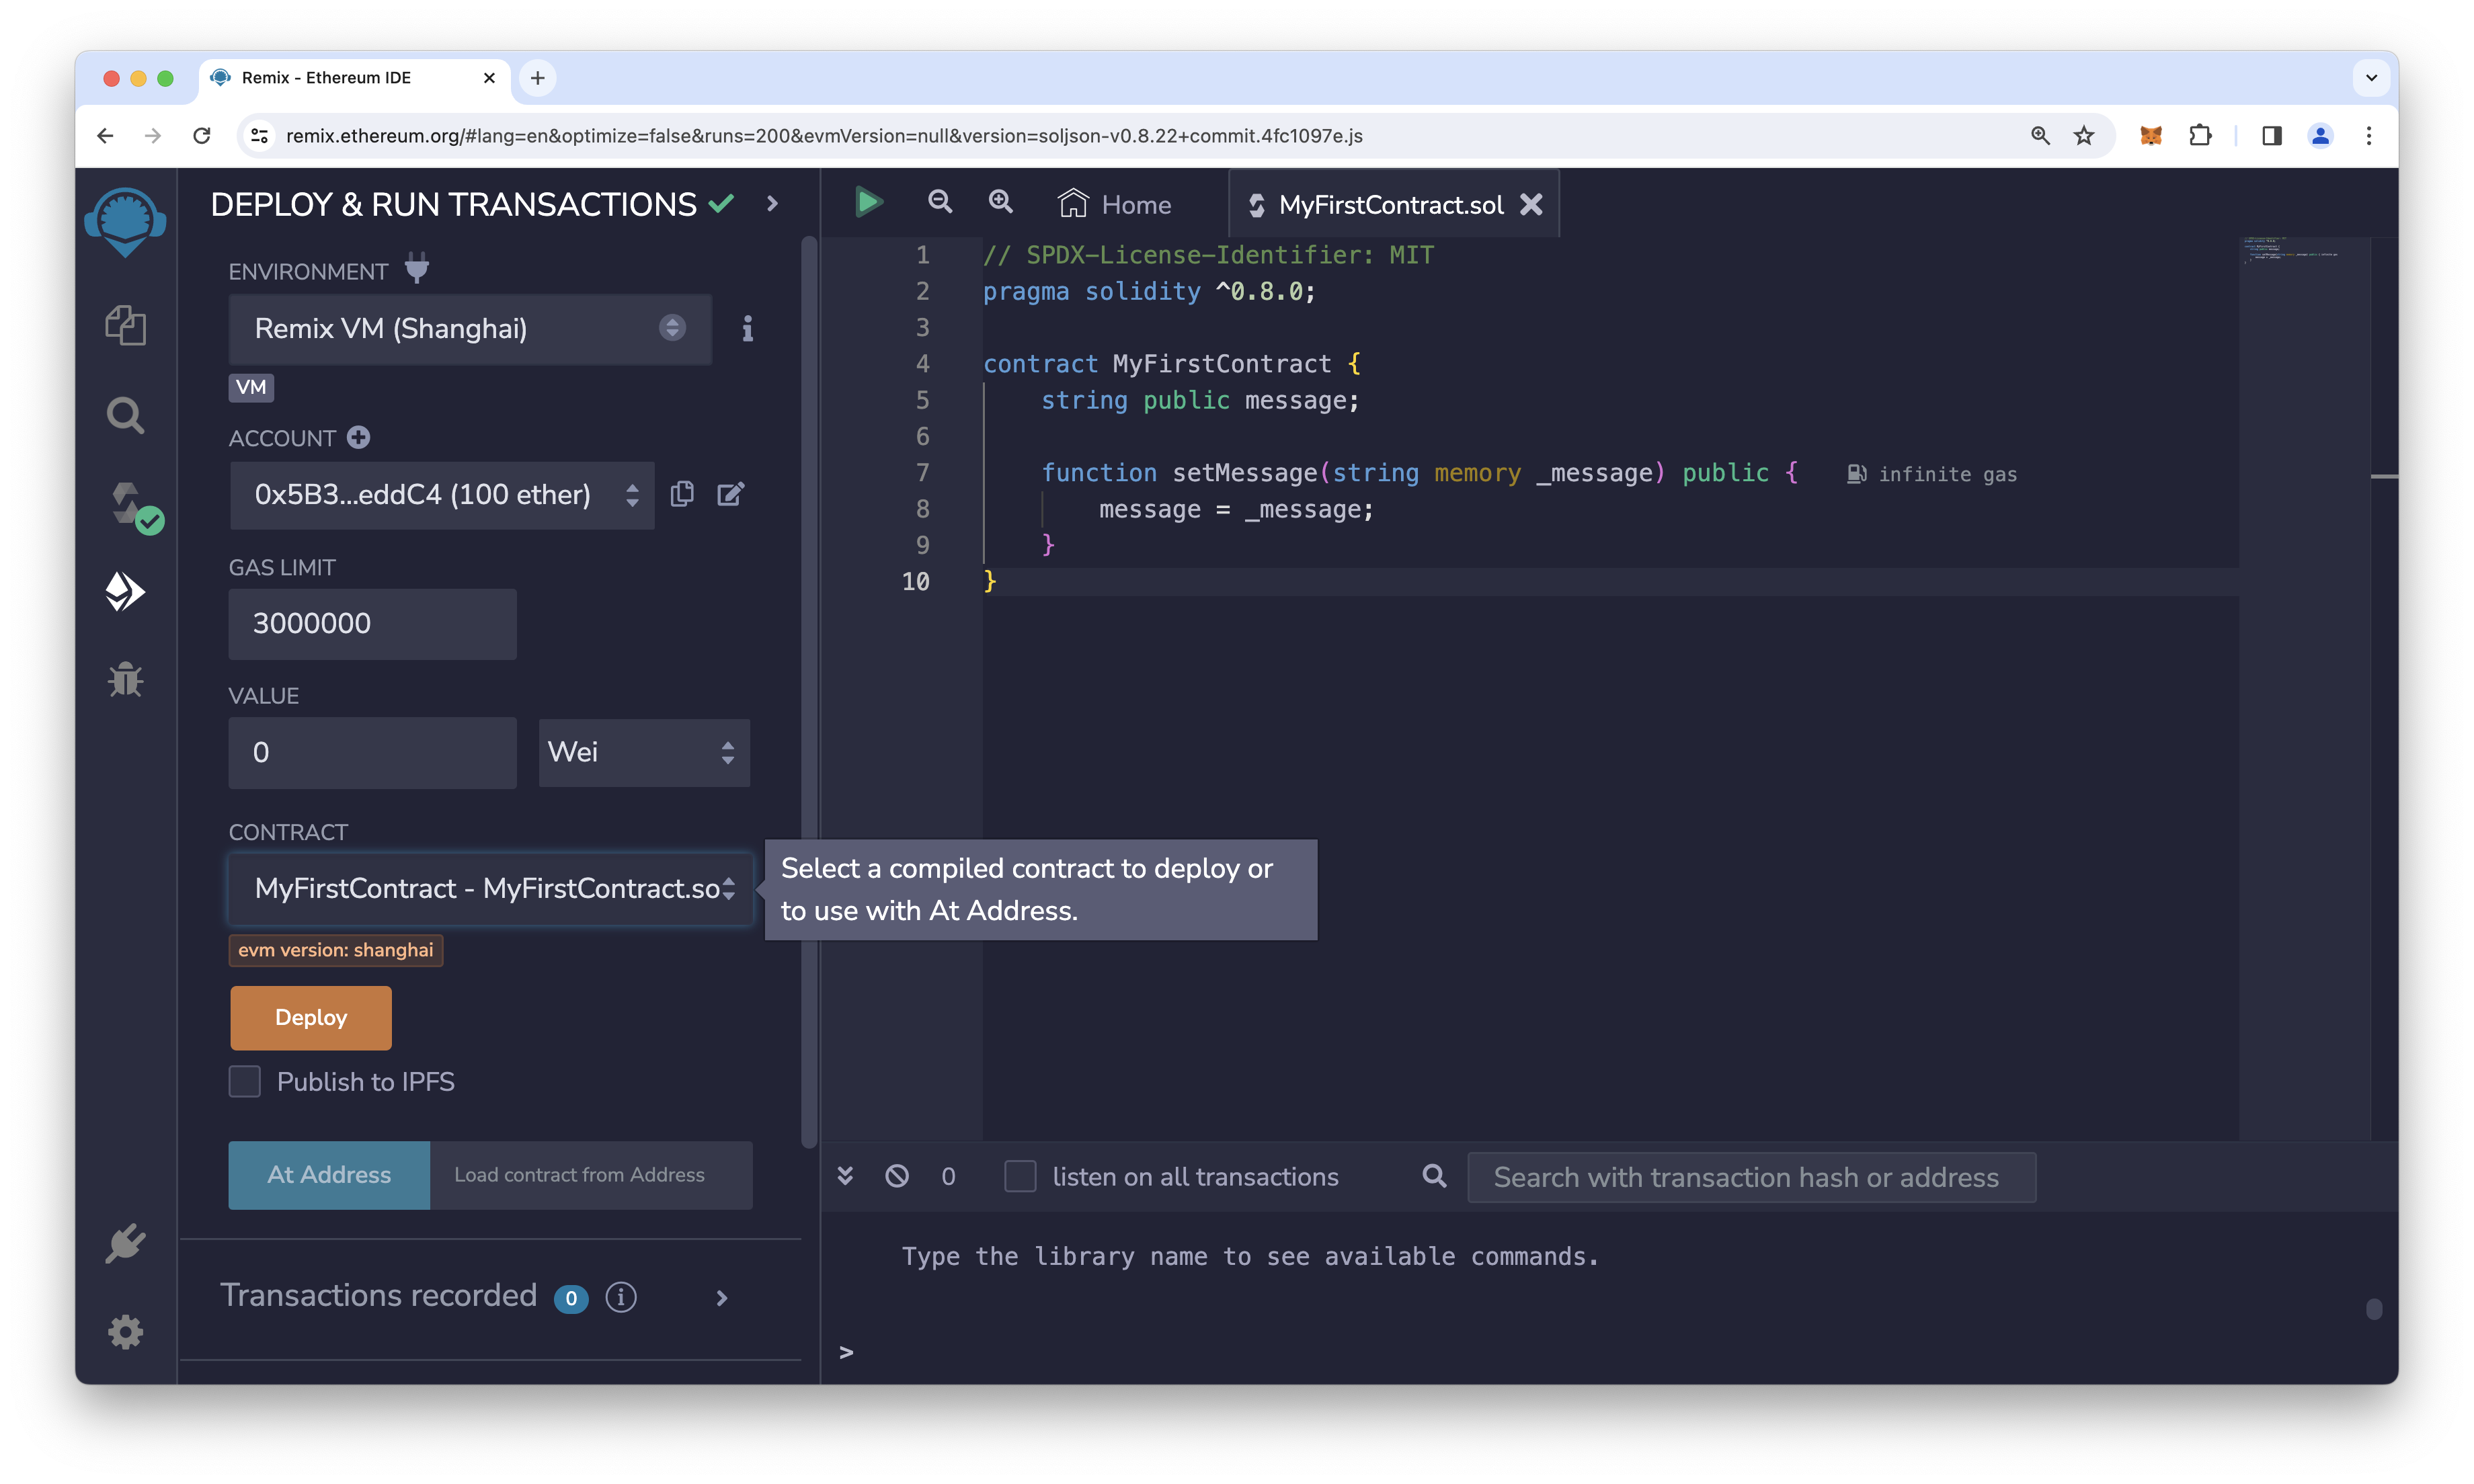
Click on the “Deploy & run transactions” icon in the left sidebar to open the Deploy tab (it looks like an Ethereum logo with an arrow pointing to the right).
You’ll see some deployment options and a list of contracts that are currently compiled.
Since you only have one contract, you should see a single contract called “MyFirstContract” in the list.
By default, Remix will try to deploy your contract to a local, in-memory blockchain.
This is useful for testing, but you’ll need to change your environment to deploy to OP Sepolia for this tutorial.
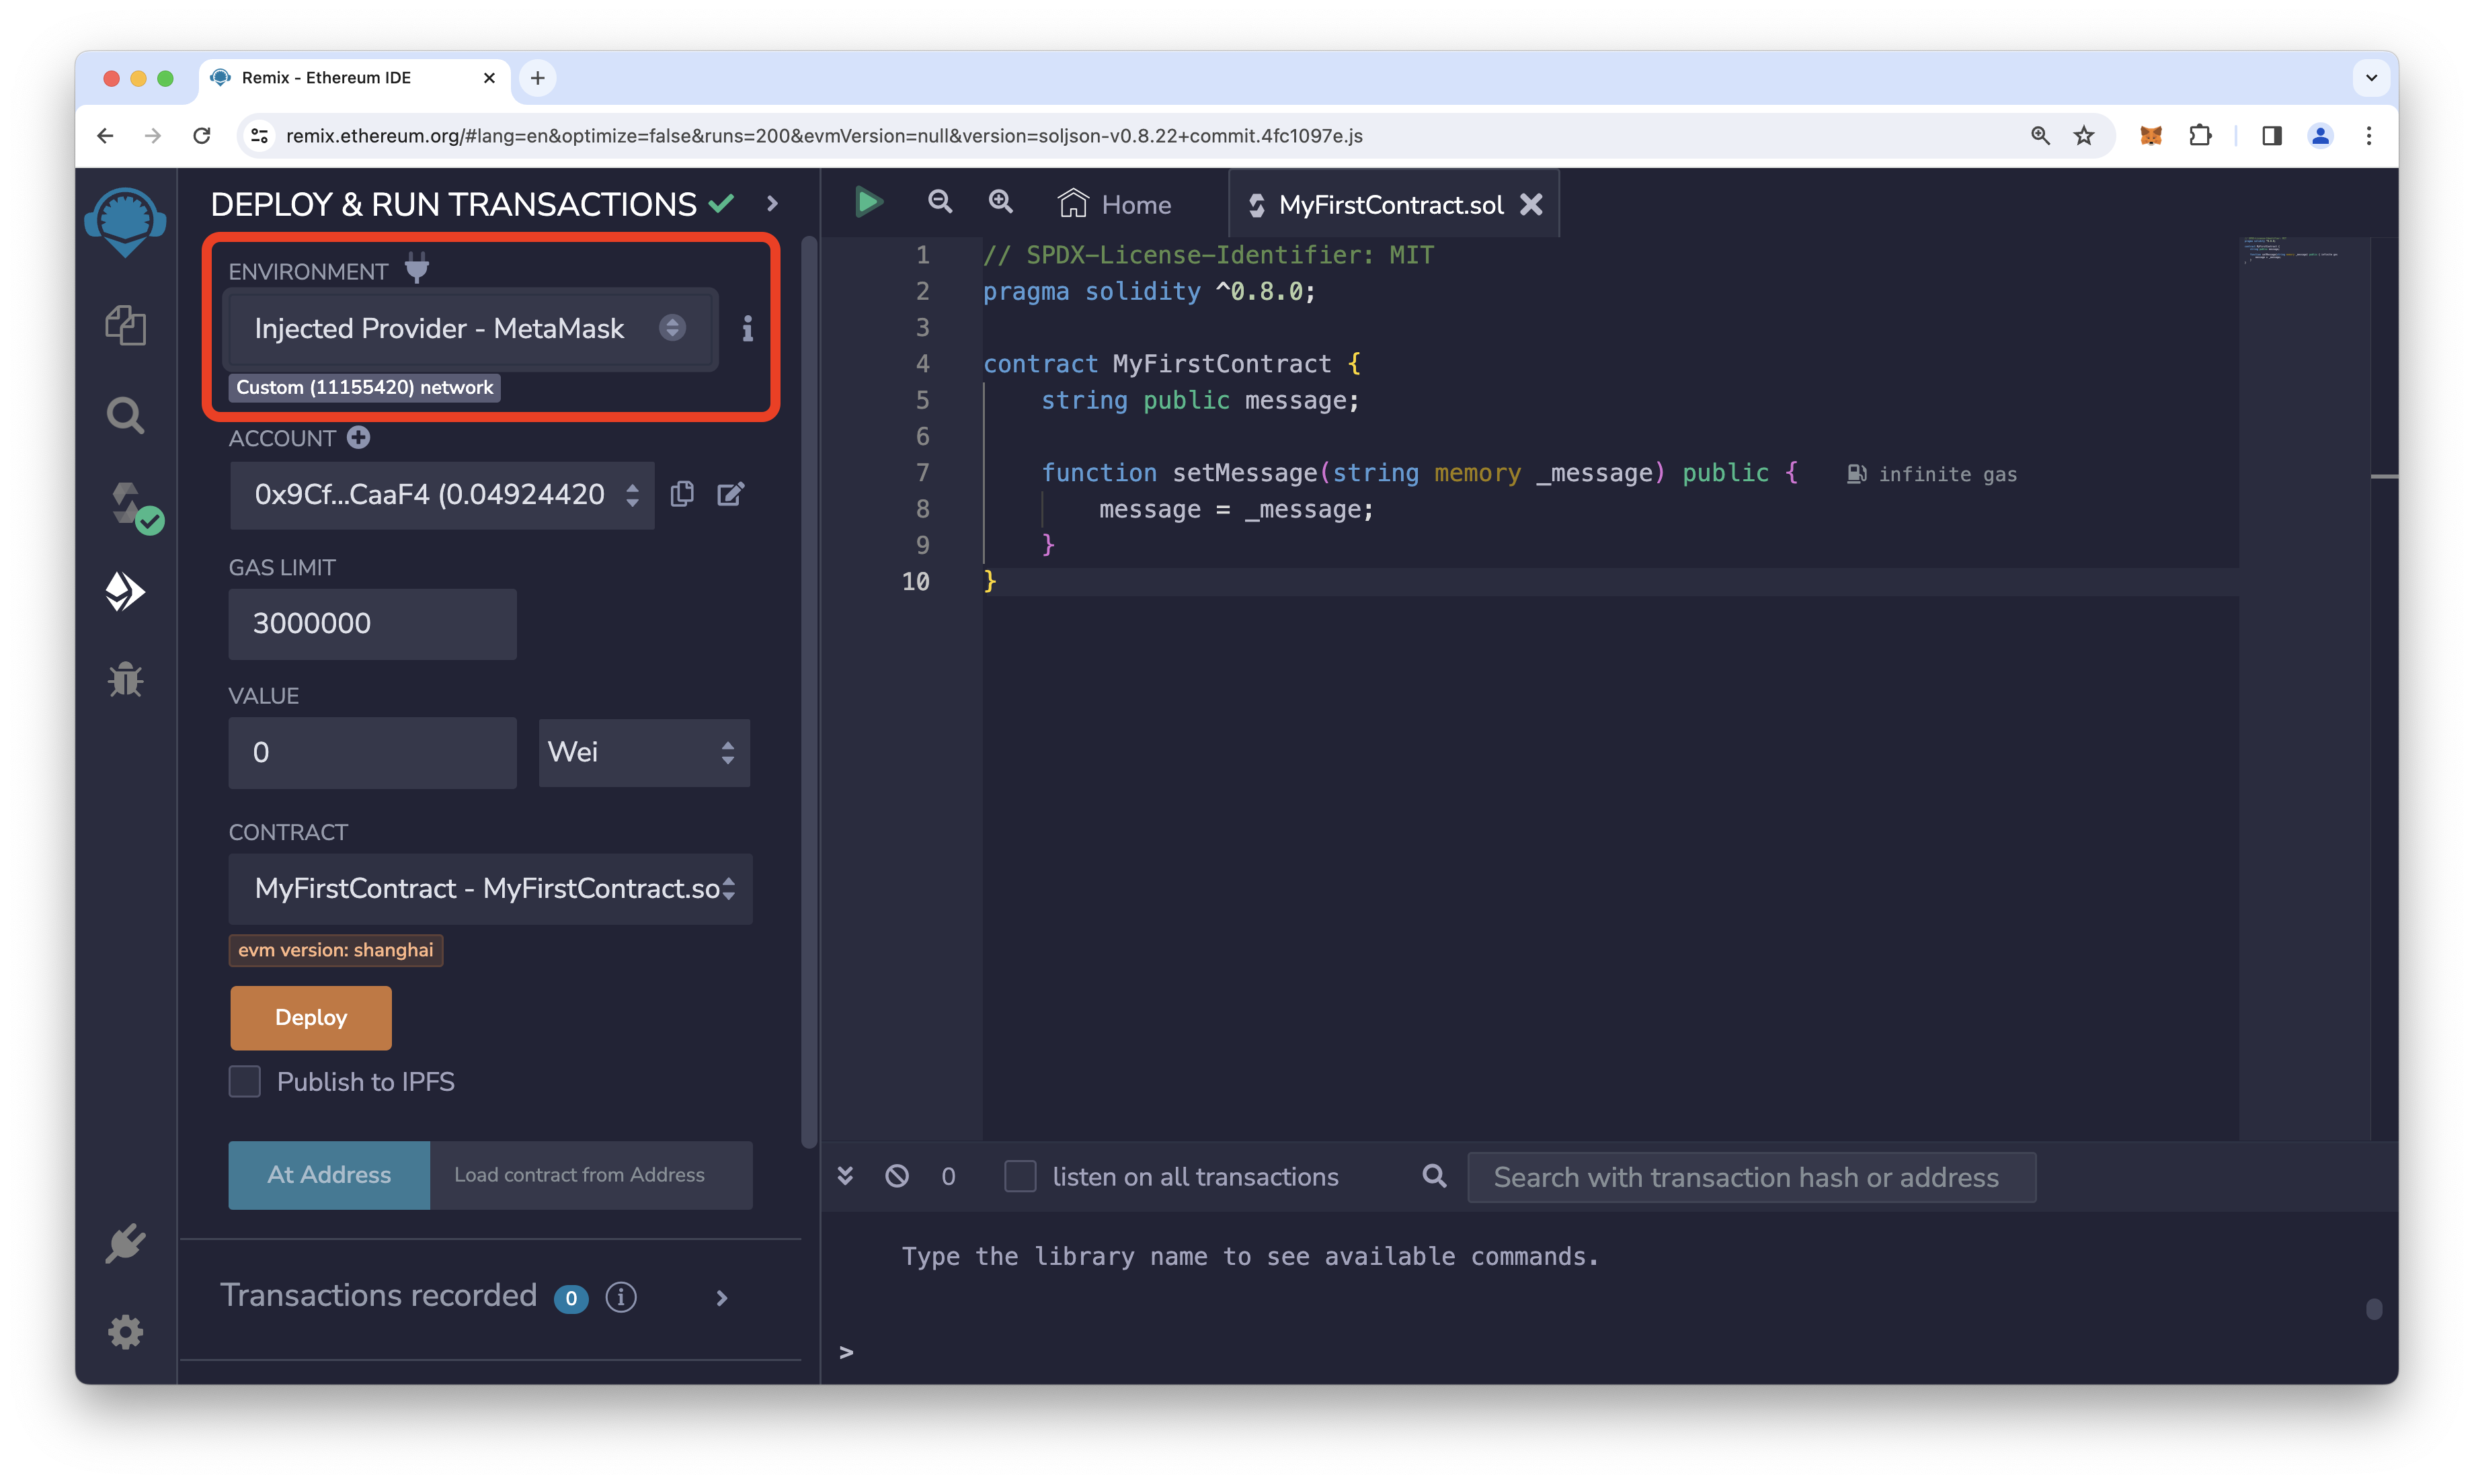
Click on the dropdown underneath the “Environment” heading and select “Injected Provider - MetaMask”.
Once you’ve selected the “Injected Provider - MetaMask” option, MetaMask will show you a popup asking if you’d like to connect to Remix.
Accept this request by clicking the “Connect” button.
You’re now ready to deploy your contract!
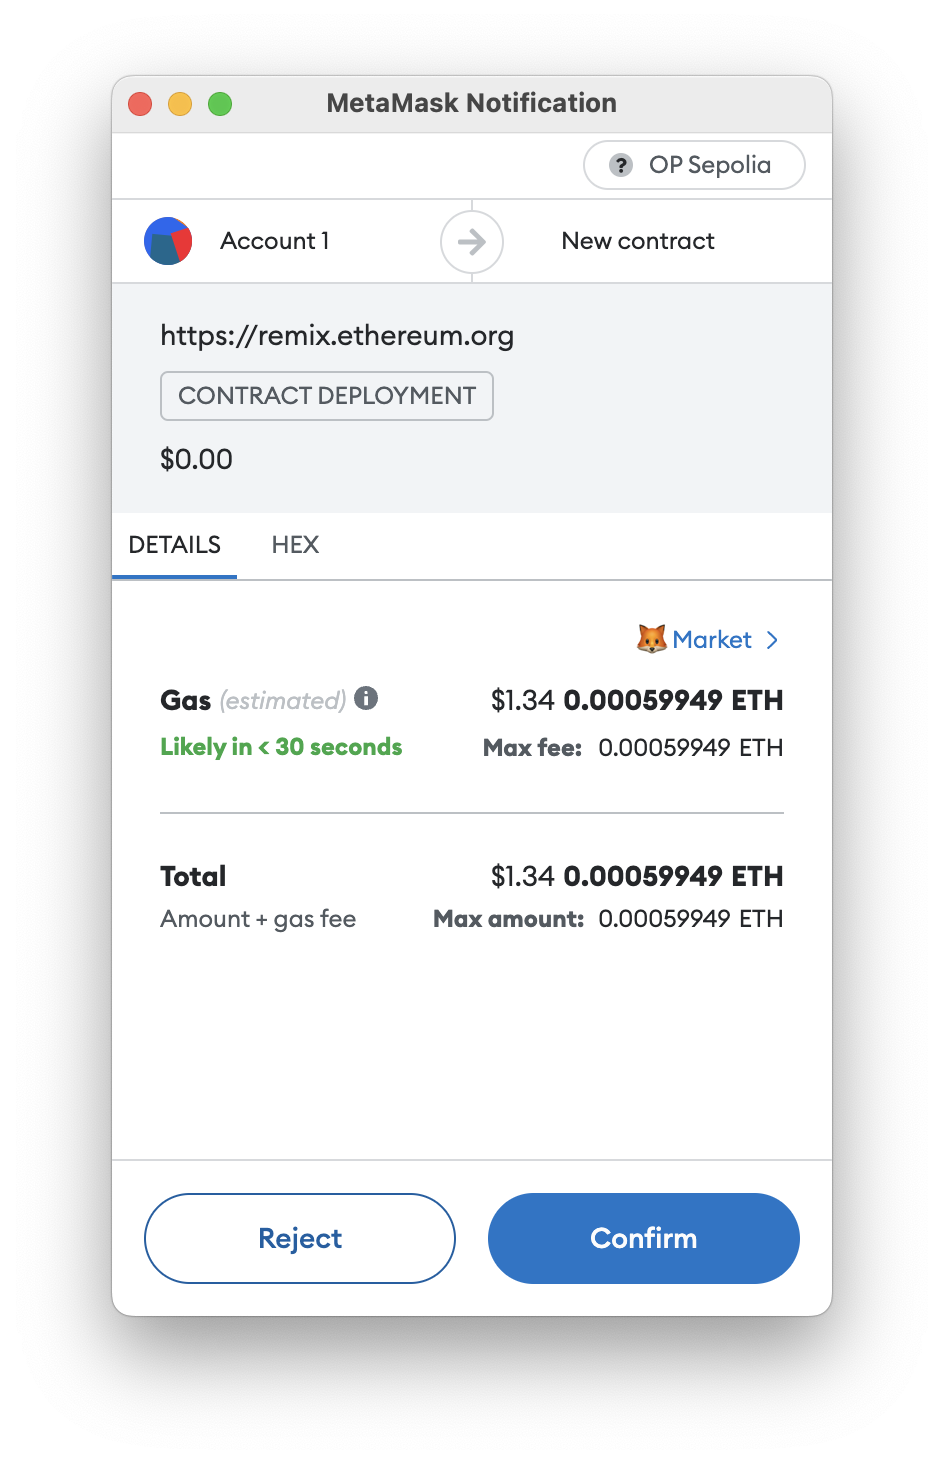
Click the orange “Deploy” button to deploy your contract to OP Sepolia.
You’ll be presented with another MetaMask popup asking you to confirm the transaction.
Click the “Confirm” button to continue.
OP Sepolia is relatively fast, so transactions should confirm within just a few seconds.
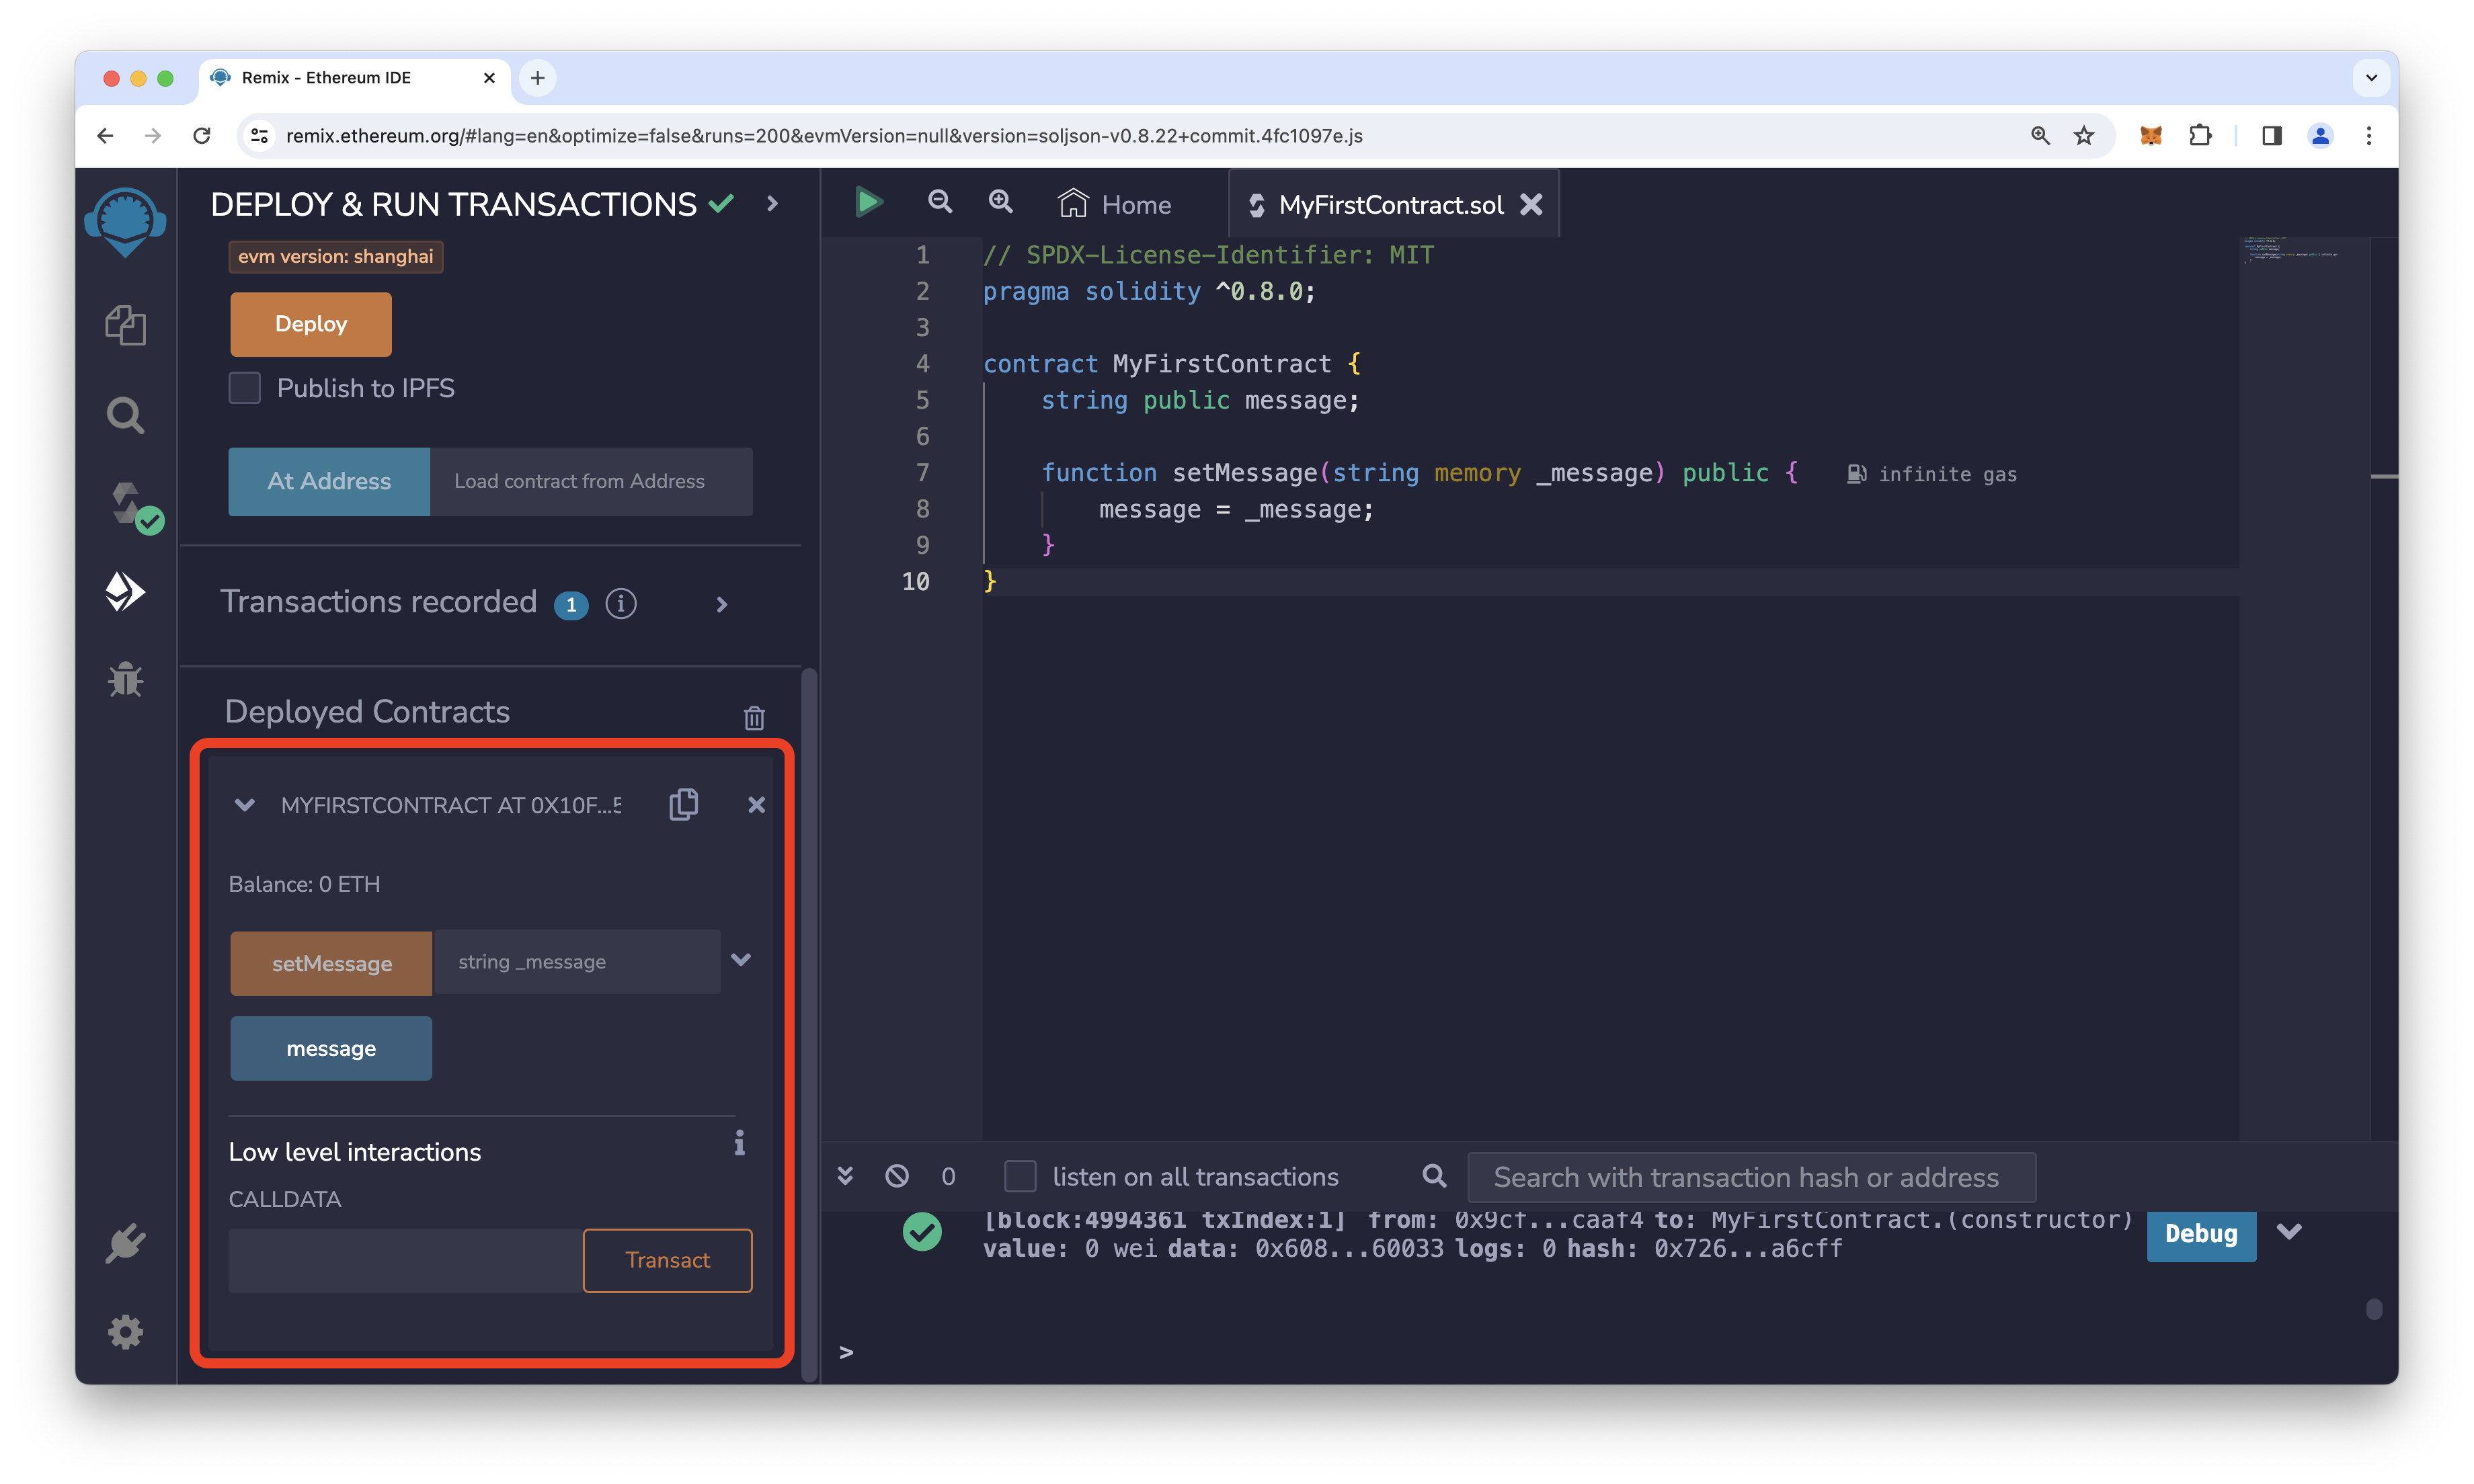
Remix will automatically detect when your transaction has confirmed and will show you your newly deployed contract under the “Deployed Contracts” heading within the Deploy tab.
Interact With Your Contract
Now that you’ve deployed your contract, you can interact with it.
Remix makes it easy to interact with your contract by providing a built-in user interface.
You can use this interface to call functions on your contract and read its state.
Click on the arrow next to the name of your contract under the “Deployed Contracts” heading to expand it.
You should see a list of functions that you can call on your contract.
Now you’ll update the message variable in your contract.
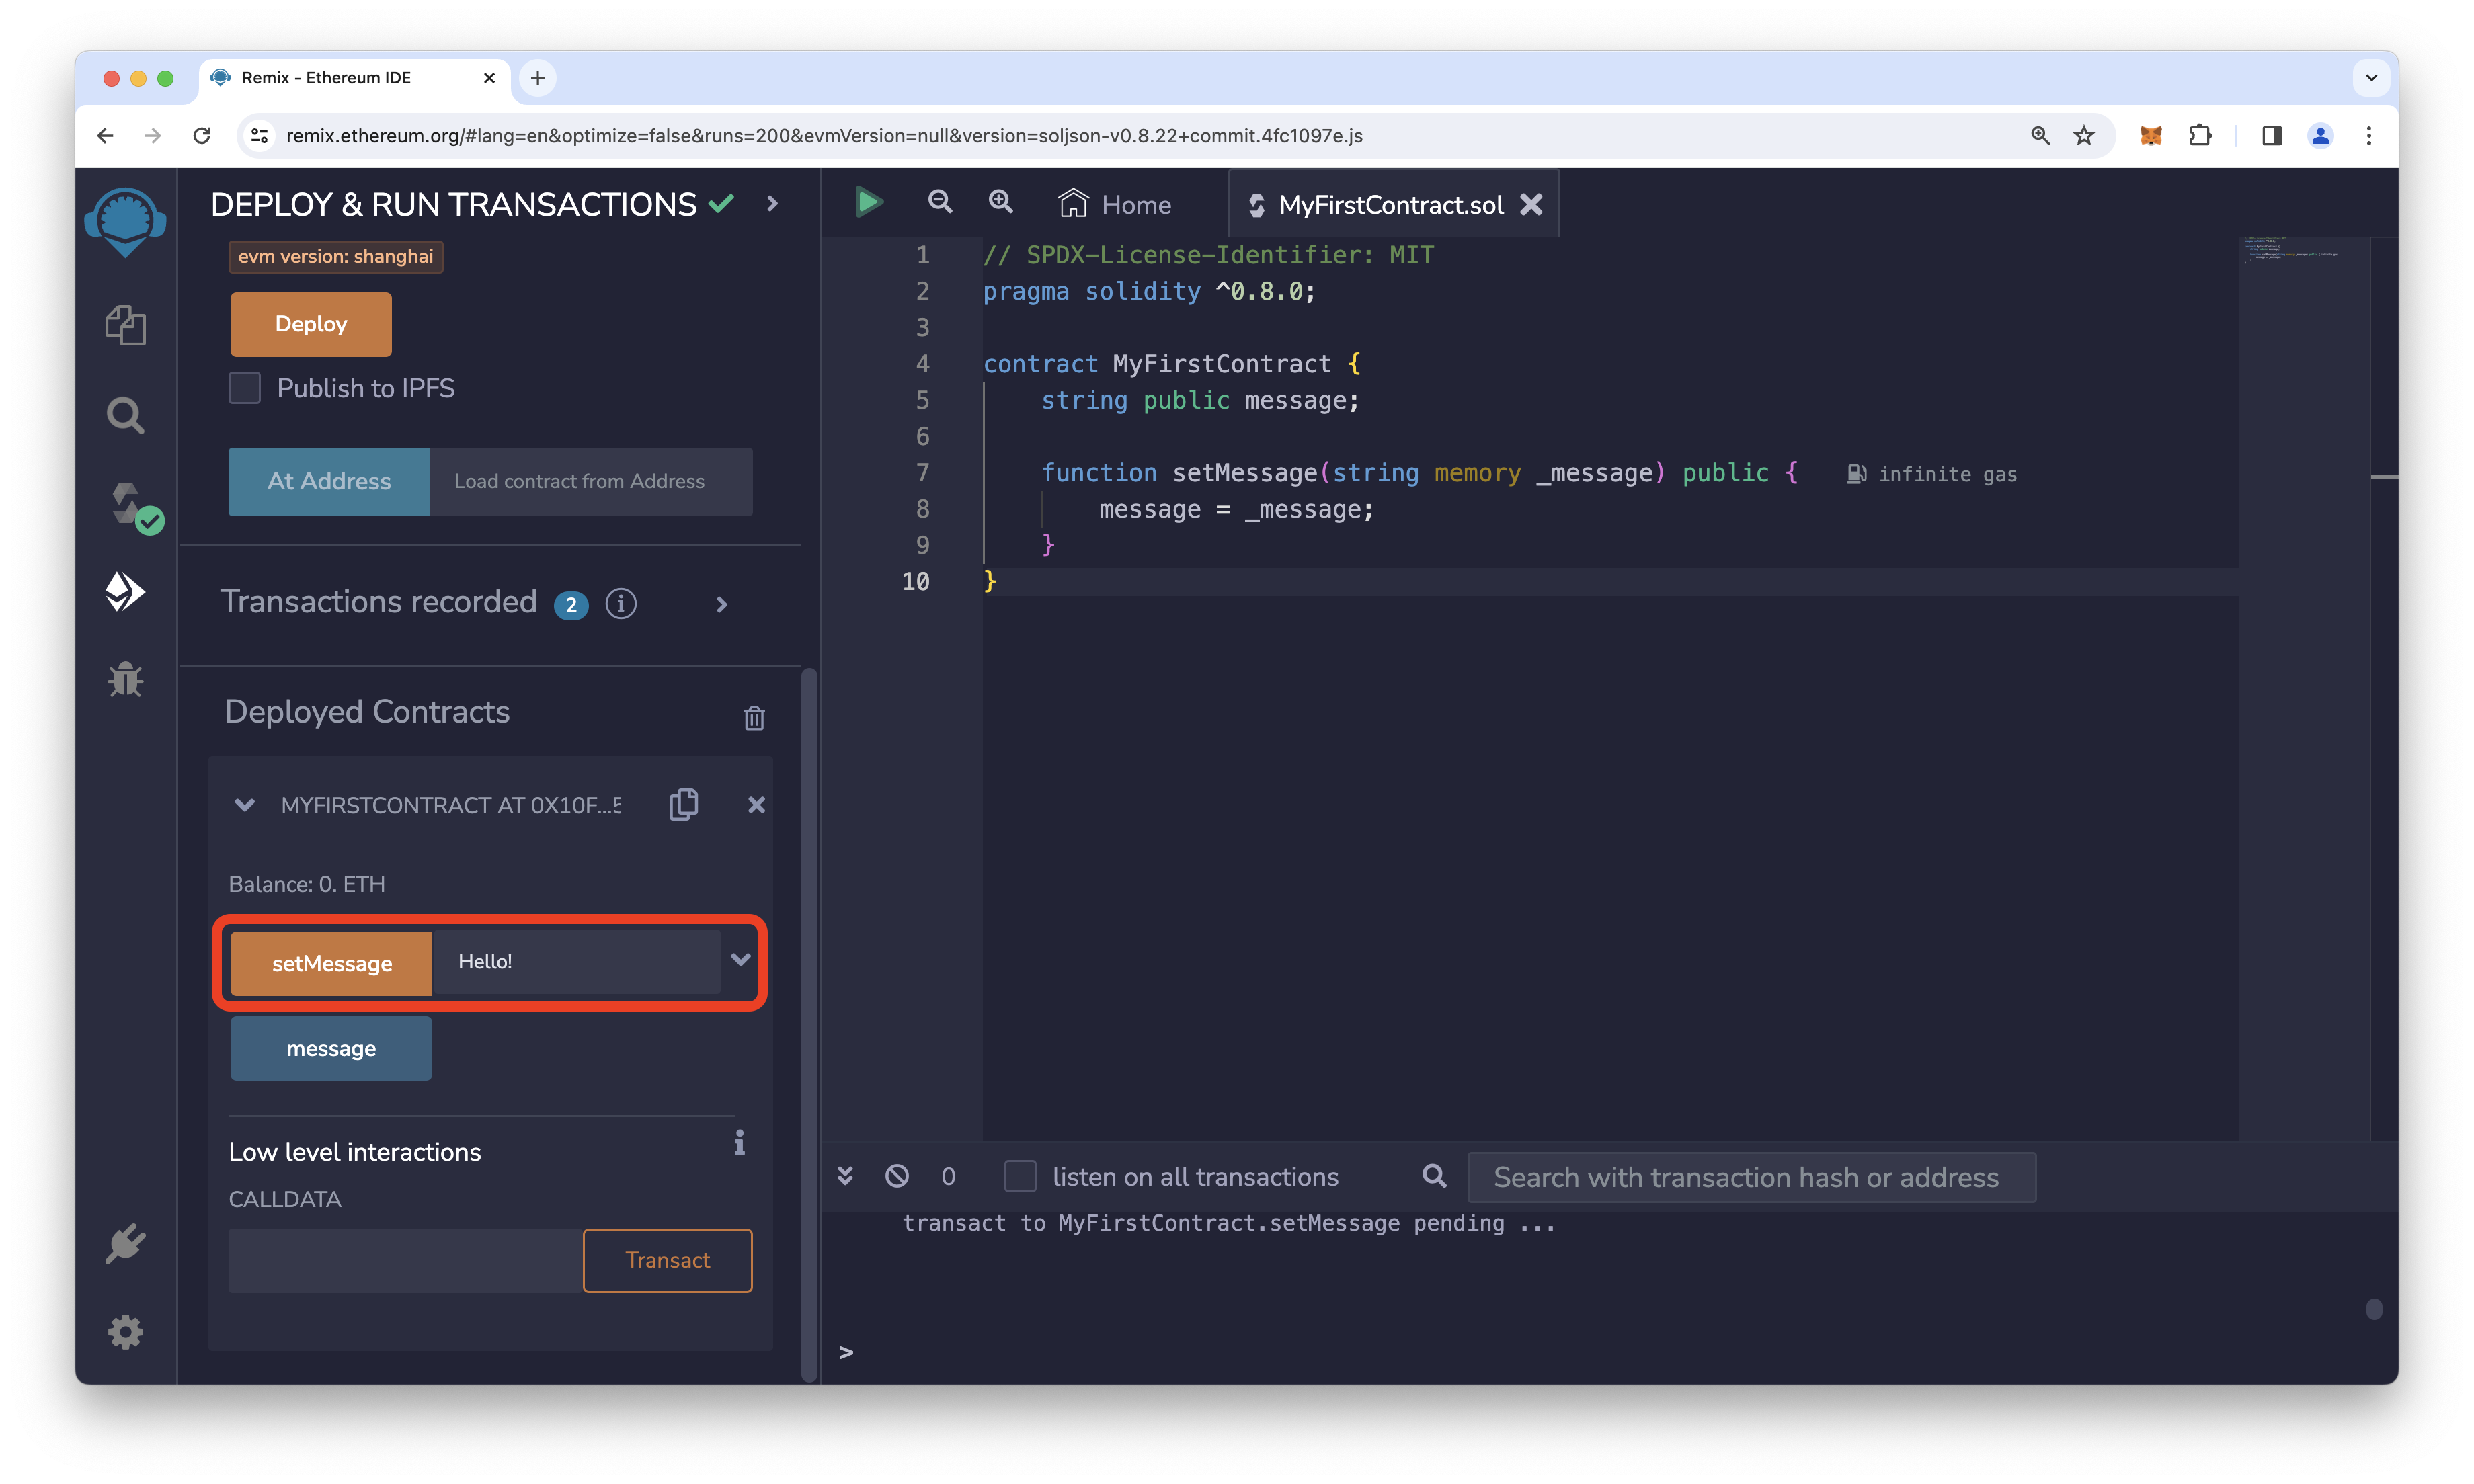
Type a message into the input box next to the orange “setMessage” button and click on the “setMessage” button.
Just like when you deployed your contract, you’ll be presented with a MetaMask popup asking you to confirm the transaction.
Click the “Confirm” button to continue.
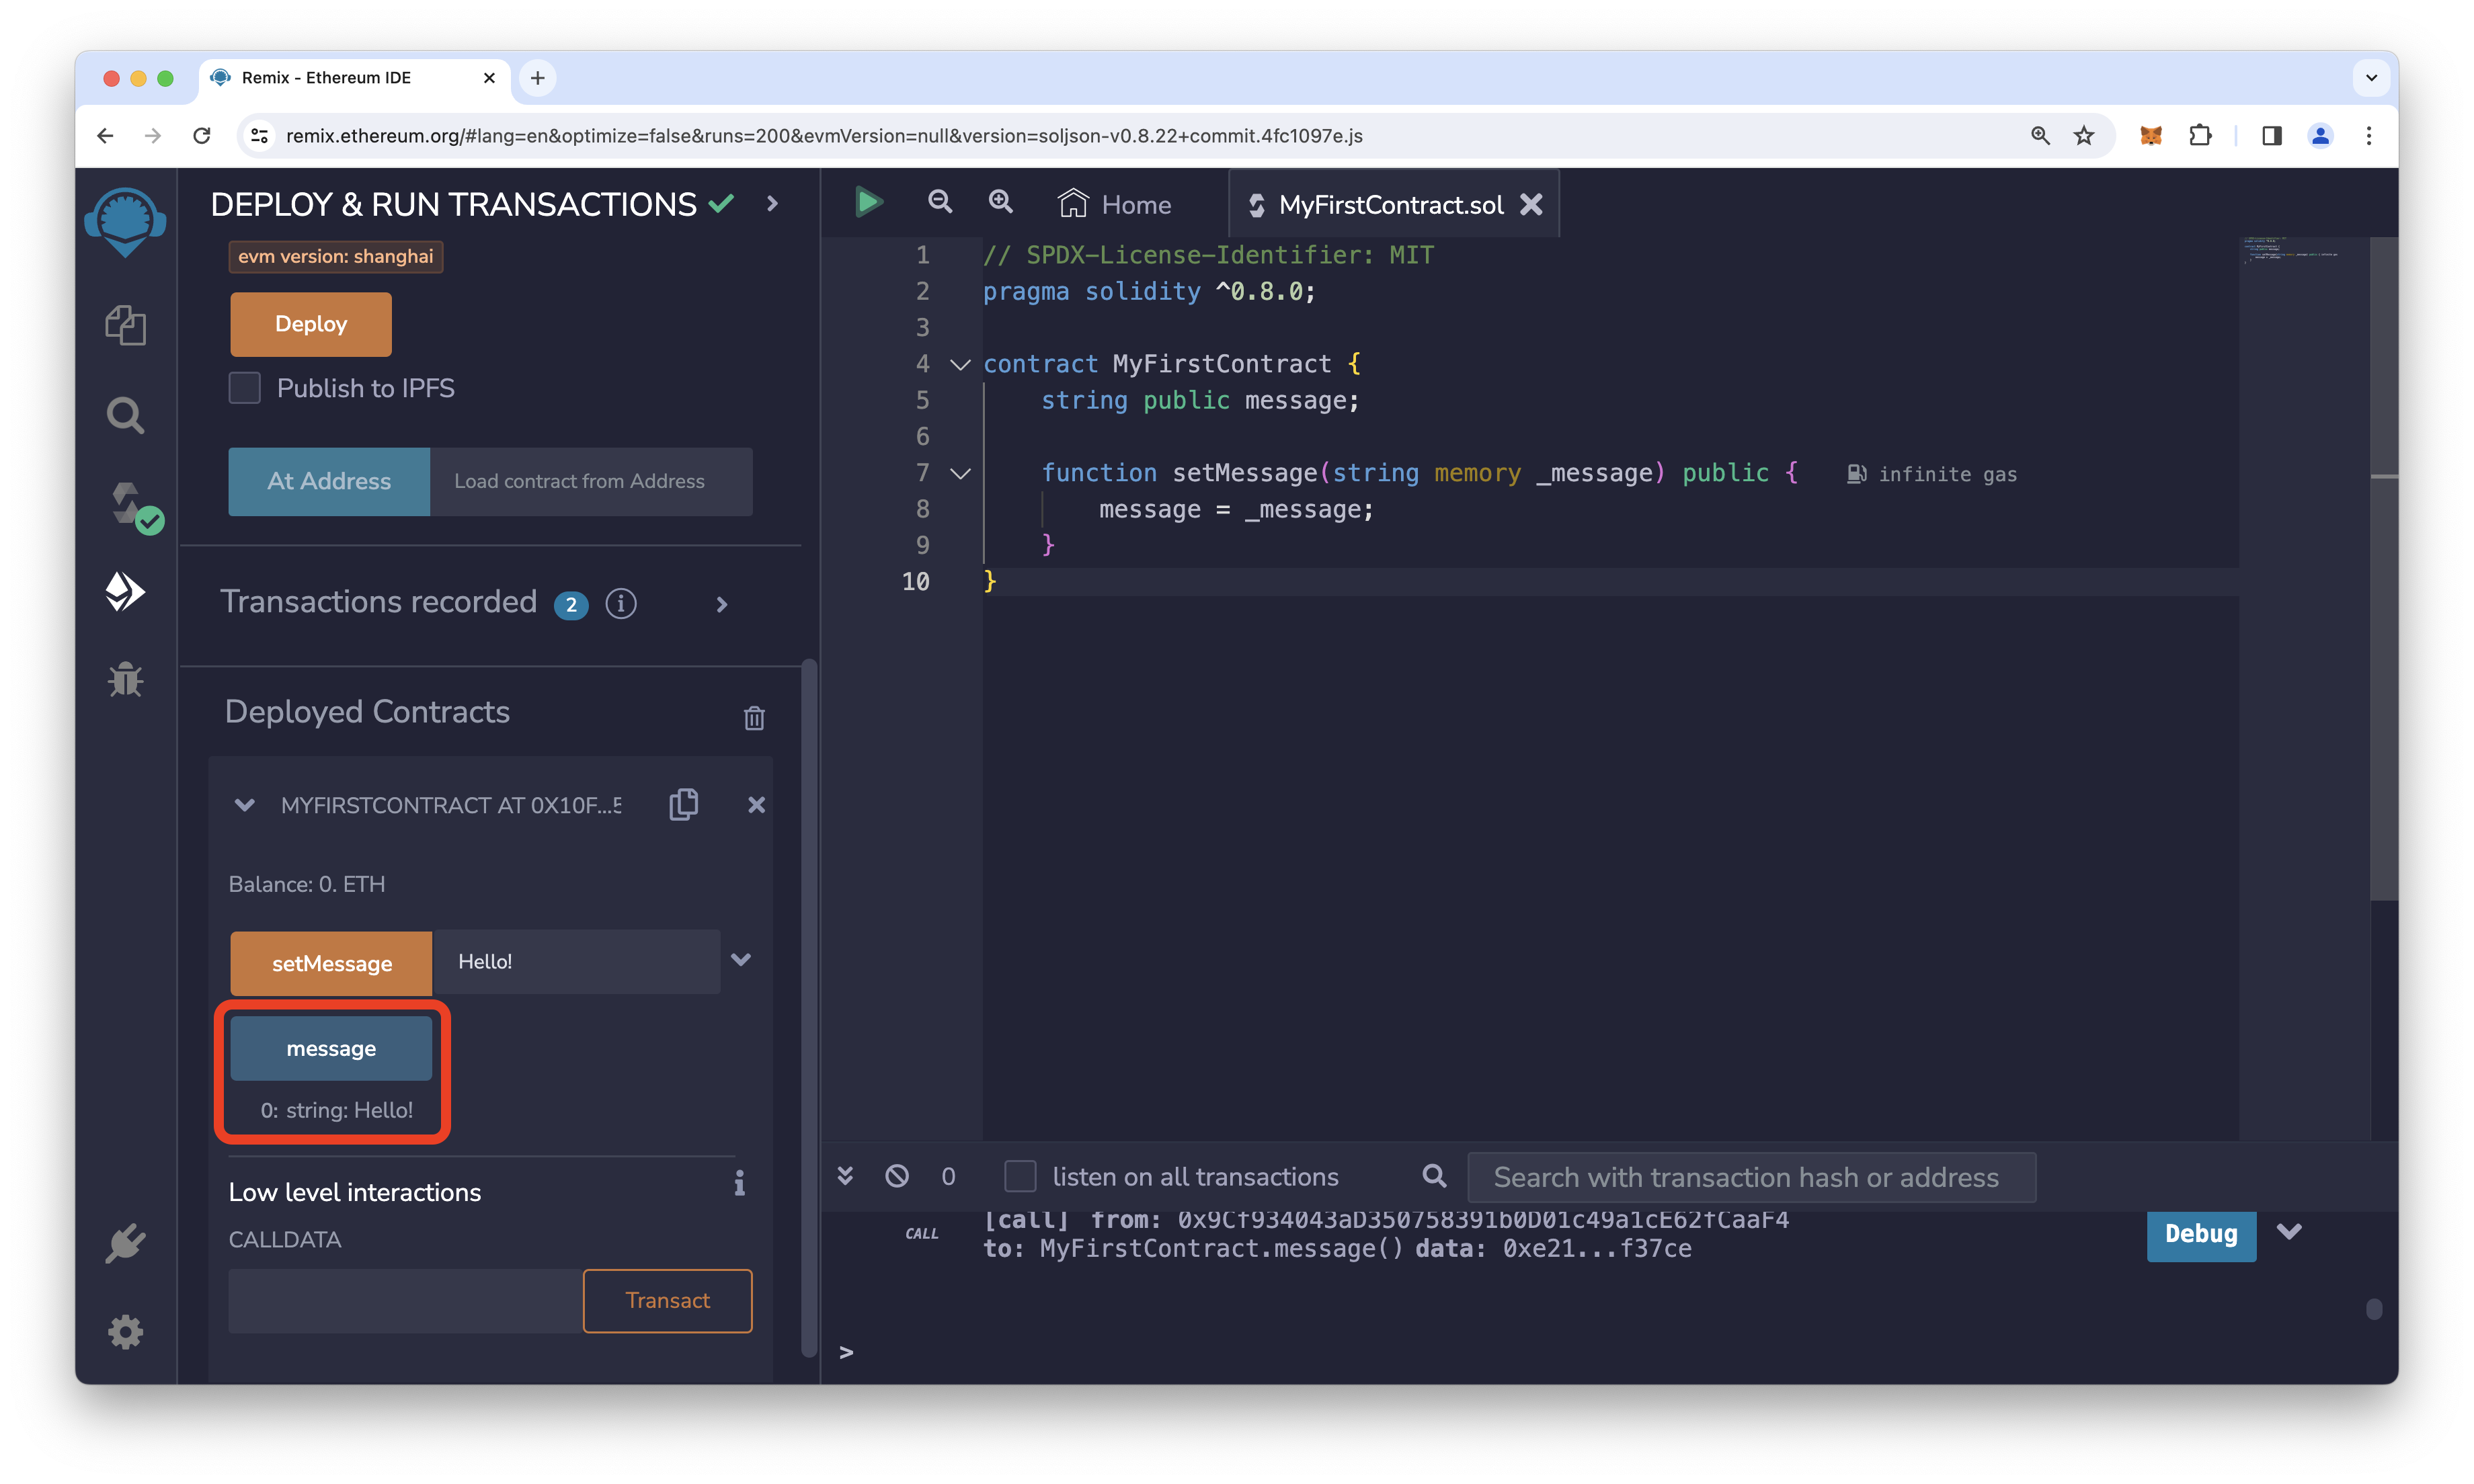
Once again, Remix will automatically detect when your transaction has confirmed.
You’ll see a green checkmark appear in the console at the bottom of the screen.
Click on the “message” button to read the updated message variable.
You should see the message you set in the previous step appear underneath the “message” button.
Congrats, you’ve successfully deployed and interacted with your first smart contract on OP Sepolia!
How Your Contract Works
Now that you’ve deployed your contract, you might be wondering how it works.
Let’s take a closer look at the code you wrote.
License Identifier
The first line of most Solidity files is the license identifier.
This line is used to specify the license under which the code is released.
In this case, the code written is released under the MIT license.
file=<rootDir>/public/tutorials/first-contract.sol#L1 hash=8384d75c38c570f3edb87cf9f64f2ec2
Pragma Directive
The next line is a pragma directive.
This line tells the Solidity compiler which version of the Solidity language to use.
In this case, the code is written for Solidity version 0.8.0 or higher.
file=<rootDir>/public/tutorials/first-contract.sol#L2 hash=70ebe002bc5488bb81baa0504de273c1
Contract Definition
The next line defines a contract called MyFirstContract.
A contract is a collection of code and data that is stored at a specific address on the blockchain.
You can think of a contract as a class in an object-oriented programming language.
The contract definition is followed by a pair of curly braces that contain the contract’s code.
file=<rootDir>/public/tutorials/first-contract.sol#L4 hash=8f3ace25e5f9ea06d8cb388eb3ab1775
Message Variable
The first thing you’ll notice inside the contract definition is a variable called message.
This variable is declared as a string, which is a Solidity type that represents a string of characters.
The public keyword means that this variable can be read from outside the contract.
file=<rootDir>/public/tutorials/first-contract.sol#L5 hash=42a1bdfe81e5b3bba6b99d3255ef4f2b
Message Update Function
The next thing you’ll notice is a function called setMessage.
This function takes a single argument called _message of type string.
The public keyword means that this function can be called from outside the contract by anyone.
Since this function doesn’t have any access control, anyone can update the message variable.
file=<rootDir>/public/tutorials/first-contract.sol#L7-L9 hash=b7e5531c48425b183e794f9f251c5540
Next Steps
To learn more about Solidity, check out this list of resources on the Adventure Layer Help Center.
If you learn best by reading source code, check out this annotated code for an ERC-20 token contract.
You can also check out the Solidity documentation for more information about the language itself.
Now that you know how to deploy a smart contract to OP Sepolia, you can deploy a smart contract to Adventure Layer Testnet in exactly the same way.
If you’re up for a challenge, try creating a token on Sepolia and OP Sepolia and then using the Adventure Layer SDK to bridge some tokens between the two networks.